13 Day North India Itinerary

This blog post is in collaboration with The Dragon Trip, however all thoughts and opinions are solely my own. This blog is based on my experience in joining one of their tours, the 13 Day North India Tour.


Since returning from my trip to India, i’ve been asked endlessly what the country is like. While there are endless ways to describe it, the word that seems to pops out of my mouth first is always “chaotic”.

India is totally, utterly, and completely chaotic, but in the best way possible. You have the vibrant streets filled with excited vendors, monkeys scaling the buildings above your head, the smell of street food wafting through the air (and yes, sometimes a few more.. err, unpleasant aromas also haha), a constant buzz of horns honking, and a blur of rickshaws, motorcycles, and cars whizzing past you. It’s at times overwhelming, but if you can see the beauty amidst the chaos, you’ll fall in love with the country before you know what hit you.

I spent the final two weeks of October touring through Northern India with The Dragon Trip, and together we visited 8 cities over the course of 13 days. In this blog i’m going to give you a breakdown on our exact route through North India, so i’m sorry (kind of) if your bucket list gets quite a bit longer now!

Here is a link to the exact tour I did - The 13 Day North India Tour - and if you’re looking for more information on what a group tour is like, what to eat, what to pack, and more, then read my blog, The Dragon Trip India Review: Accommodation, Transport, Costs, & Travel Tips

So, without further ado, if you’re keen to know more about my Northern India itinerary, then read on!


jodhpur dogs.JPG
 

Itinerary Breakdown: 13 Day North India Tour

Delhi

Delhi was the first stop of the tour, so our hostel was the the initial meeting point to get to know the rest of the group. After *attempting* to learn all 22 names over a family dinner on the rooftop of our hostel, we all jumped in rickshaws and whizzed our way over to Gurudwara Bangla Sahib, Delhi’s largest Sikh Temple.

Accommodation: Himalayan Hostel


Varanasi

Being totally honest, Varanasi was quite overwhelming for me, yet beautiful in its own way. A little background: Varanasi is a city known for being the spiritual capital of India, and the river that flows through it is incredibly sacred for its holy water. Each day, the city holds hundreds of Hindu burning ceremonies along the river banks (sometimes 500+ per day), where they burn the bodies of the dead and then scatter the ashes into the river Ganges.

On our first night in Varanasi, we walked down to the river as a group, hopped into a huge boat, and had the chance to witness these burning ceremonies from the water. The experience itself is hard to find the words for. There was definitely the culture shock of “woah, those are actual bodies in that fire”, but also comes with the realization that the ceremony is seen as a celebration of life, rather than mourning of the dead, which is how I think funerals should be. And the experience of being out on the water was incredibly peaceful compared to the bustling city streets, so it seemed crazy to find such calm amidst the chaos.

The next morning we did a sunrise boat tour along the Ganges where we got to witness the city waking up, and ended the morning by taste-testing some of the city’s famous lassi.

Varanasi Activities:

  • Evening boat trip to see the burning ceremonies

  • Morning boat trip to watch the sunrise from the river Ganges

  • Drinking Lassi

  • Overnight train to Agra

Accommodation: Zostel


Agra

On Day 4 of the tour, we arrived in the city of Agra, most famously known for being home to the Taj Mahal. While most people go to Agra *specifically* for a few hours at the Taj, there’s way more to experience in Agra than just the World Wonder!

agra fort squirrel.JPG

Agra Fort

agra fort door.JPG

A 20 minute rickshaw ride from our hostel brought us to the beautifully designed Agra Fort, which is a complex of red sandstone buildings constructed in the 1500’s. It’s often overshadowed by the Taj Mahal, but Agra Fort is iconic in its own ways. Impressive archways, lush landscaped gardens, giant palaces, and teeny tiny Indian squirrels are just a few of the draws of this place, and if that doesn’t float your boat, there is also the view of the Taj Mahal in the distance that will get you seriously pumped for your visit.

Later that evening we set our alarms for the rather harsh hour of 4:30am, and got ready for one of those bucket list, ‘oh my god is this really happening’ sort of days that ensued!

Taj Mahal

Although we beat the sun, we did not manage to beat the crowds! I think that’s pretty standard for the Taj Mahal though, because after all, it’s one of the 7 new wonders of the world. But with how big the complex actually turned out to be, I was able to easily find some peaceful corners to watch the sunrise from. If you’re keen on getting some amazing photos, my best recommendation is to head straight to the Mosque in the back left corner of the complex. From there, you can find the iconic archways which make for beautiful photo-ops, and if you keep walking towards the river you’ll find some calm, quiet spots to hang out at!

A few more tips:

  • If you book your ticket online, you can skip the long line and get through security way faster. Security can take 30 minutes otherwise, and it’s always longer for the female line because we have to be frisked (oh, the joys of being a girl).

  • Don’t bother bringing your fancy camera gear. No tripods, drones, gimbals, selfie sticks, laptops, or video equipment. Phones and cameras (including DSLR’s) are ok, but if you are found with anything professional-level, you won’t be allowed to enter with it.

  • There is no set dress code, but consider wearing culturally appropriate clothes (cover your knees, bring a scarf for your shoulders, no shorts, etc.)

  • You aren’t allowed to bring large bags or backpacks inside the Taj Mahal due to safety reasons, so leave them behind. Small camera bags and purses with your essentials are ok.

  • You can’t consume any food on the premises, nor can you smoke.

taj mahal sunrise.JPG
taj mahal selfie.JPG

Agra Activities:

  • Agra Fort

  • Taj Mahal

Accommodation: Zostel


Jaipur

Jaipur is one of the cities I was most looking forward to, partly because I saw the phrase “monkey temple” on the itinerary, but also mostly because I LOOOOVE colourful cities. If I see a colourful wall, my camera will be out and clicking before you can even blink. While there are countless beautiful places to visit in Jaipur, i’ll keep the list short and give you the low down on my favourite things.

Hawa Mahal

It’s sometimes known as the Palace of Winds, and also sometimes referred to as “that crazy weird pink building", but the Hawa Mahal was a building I had been aching to see ever since discovering it on Pinterest back in the day. I thought I would have to battle some fellow tourists to snap a selfie in front of the building, but low and behold, our group ended up having a rooftop family dinner at the Tattoo Cafe & Lounge, which happened to be located directly across the road from the Hawa Mahal (with the most epic views!). It was so beautiful that I ended up returning the following day for a good old Masala Chai, and to of course get my long-awaited pink palace selfie.

City Palace

If you like elaborately decorated doorways, pink everything, and jaw-dropping opulence, then the City Palace is the place to be. As I said, I’m a sucker for the colors, so when we had free time to do what we wanted for the day, I jumped at the chance to see the City Palace. It cost 700 rupees to enter, and if you want to see “the best of the best” rooms (that you’ve likely seen all over the ‘gram these days), then you’ll have to pay a whopping 2500 rupees to enter the Chandra Mahal. Since the cheap life runs in my veins, I opted for the basic option, which still turned out to be anything but basic!

Jaipur Activities:

  • Henna at the hostel

  • Amber Fort

  • Nahargarh Fort

  • Monkey Temple

  • Free Day: Spent at the City Palace and the Hawa Mahal

  • Street food tour

  • Overnight train to Jaisalmer

Accommodation: Zostel


Jaisalmer / Thar Desert

jaisalmer desert sunset.JPG
jaisalmer desert camel.JPG
jaisalmer desert sunrise.JPG

On Day 9 of The Dragon Trip tour, our group arrived in Jaisalmer, otherwise known as the “Golden City”. Because all the buildings are made from the same yellow sandstone, it means the whole city appears to have a golden glow about it (hence the name). We dropped our backpacks off at a local hostel, had a quick shower, and headed into the desert for one of my all-time favourite memories from the trip.

The Thar Desert, otherwise known as the Great Indian Desert, is located about 40km from the city of Jaisalmer and forms a natural boundary between India and Pakistan.

I don’t know about you, but when I imagined India, I definitely didn’t picture rolling sand dunes and camels, so the whole experience was quite surreal. Our group arrived at the sand dunes just as the sun was setting, so we raced around taking photos of the burning red sunset, cracked open a few beers, had some seriously deep conversations about life, and settled into our beds for the night!

I’ll let the photos do the talking for me, but let me just say that sleeping beneath the stars sans-tent in the desert is easily the coolest travel memory I have from this year.

Thar Desert Activities:

  • Camel Trek (optional): if you’re not comfortable with riding a camel, you can hop in one of the 4x4’s and cruise the dunes to the overnight camp like Dom and I opted to do.

  • Overnight desert trip: includes a vegetarian dinner & breakfast!

  • Bus to Jodhpur

Accommodation: beneath the stars!


Jodhpur (& Diwali)

The morning after our overnight desert adventure, we had a quick sunrise breakfast, and then traveled the 5 hours to Jodhpur by bus.

Admittedly, I knew nothing of Jodhpur before arriving in India, but after spending just 48 hours touring the “Blue City”, I was SO happy it was on the itinerary. Not just because the buildings were all splashed with shades of aqua, blue, and turquoise colors, but also because of the views and vibes there.

It just so happened that our group arrived in Jodhpur on the very first day of Diwali, so the streets were alive with celebration. Diwali is the Hindu Festival of Lights in India, and is celebrated on October 27 each year, with the festivities lasting a few days (or seemingly until the fireworks run out, LOL!). We decided to celebrate the holiday at our hostel, where they held painting, prayers, sparklers, and some crazy roadside fireworks, and it’s an experience I won’t soon forget.

Jodhpur Activities:

  • Cooking class

  • Walking tour of the city: we hopped in a rickshaw and made our way to the blue city, up to the viewpoint overlooking the city, and ended the day at a rooftop cafe for coffee overlooking the famous step well.

jodhpur streets.JPG
jodhpur stepwell.JPG
jodhpur blue.JPG

Accommodation: Moustache Jodhpur


Udaipur

The last main stop on the tour was a quick 24 hours in Udaipur, also known as the city of lakes. Our bus arrived in the city just in time for sunset, so we hurriedly made our way down to Lake Pichola for a boat tour to see the city from the water. Fun fact: the lake was artificially created in 1362 AD, making it one of India’s oldest! The following day we were given the choice of a few different activities, so I opted to spend the morning at Animal Aid, a shelter for the sick, injured, and abandoned street animals of India.

animalaidcow.JPG

As a huge animal-lover, there have been parts of India that were extremely sad for me. Cows in the streets eating plastic packaging… dogs sleeping amongst piles of rubbish… donkeys lugging around heavy carts. It all weighed on my heart pretty heavily, and the sad thing is, it’s seen as a normal part of life.

With the conditions being what they are, you can imagine there are a lot of animals who end up sick or hurt, and that’s where Animal Aid comes in. They work to rescue, rehabilitate, and essentially save animals who desperately need help, and do it all with the help of volunteers and donations.

At any given time, they have hundreds of animals in their care, and have separate areas for puppies, disabled dogs, orphaned cows, injured farm animals, and even a hydrotherapy area. We spent the morning feeding and loving on the orphaned baby cows, and then were given a tour of the facilities by one of the volunteers. If you spend any time in Udaipur yourself, I really, really hope you take the time to visit Animal Aid. What they do is nothing short of amazing, and it restores your faith in humanity to see people coming together to save the helpless street animals.

P.S. they do have an online shop selling bracelets, earrings, and other cute jewelry, so if you’re looking for a Christmas gift, consider getting something from Animal Aid because any sales go towards an incredible cause!

Udaipur Activities:

  • Sunset boat trip

  • Visiting Animal Aid

  • Yoga Class

  • Overnight train to Mumbai

Accommodation: Zostel


Mumbai

Our last day of the tour was spent in Mumbai, although it was more of a final goodbye type-of-day as the group slowly trickled out to catch their flights home. We grabbed a group lunch, went around the table and recalled our favourite moments of the tour, and said a few teary goodbyes to one another!

Accommodation: Panda Colaba


Overall, my two weeks in India was nothing short of incredible, and although the itinerary was full to the brim, it gave me the best taste of India possible. If you’re thinking of adding India to your travel plans this year and are considering a group trip yourself, then read my blog here about what traveling with a group in India is really like!

You can view & book the 13 Day North India Tour here, and view all other tour destinations here.

TRAVEL GUIDE_-14.png

The Dragon Trip India Review: Accommodation, Transport, Costs, & Travel Tips

IMG_0839.JPG

This blog post is in collaboration with The Dragon Trip, however all thoughts and opinions are solely my own. This blog is based on my experience in joining one of their tours, the 13 Day North India Tour.


Three weeks ago I embarked on the adventure of a lifetime with The Dragon Trip, an adventure-tour company operating budget backpacking tours in 9 different countries. In the 13 days on the tour I traveled through 8 cities in Northern India with 22 strangers-turned-family, and can hardly believe all the things I experienced. Sleeping under the stars in the Thar Desert, setting off fireworks for Diwali in the middle of the street, learning to cook a traditional Indian feast in Jodhpur… all of it seems like something out of my wildest dreams. India was beautiful, mesmerizing, fascinating, shocking, and crazy all wrapped up into one, and i’m already aching to return.

In this blog post i’m going to give you the inside scoop on the pros and cons of group travel, details on accommodation, transport, food, and costs, along with practical travel advice for India.

First things first, here is a link to the exact tour I did: The 13 Day North India Tour


Why choose group travel?

India’s been a place high on my bucket list for as long as I can remember, but it wasn’t somewhere I felt confident enough to travel to on my own. When the opportunity came up to jump on a tour with The Dragon Trip, I couldn’t think of a better way to explore the country than with a fellow group of adventure-loving travelers. There are definitely ups and downs when it comes to pre-organized trips, but in my personal opinion, the pro’s hugely outweigh any cons.

IMG_1394.jpg

Pros:

  • You don’t have to worry about the planning & costs. The accommodation, transportation, activities, costs, and most meals are all figured out for you, so you have way less things to worry about before & during your trip. While i’m typically a planner and a hugely independent person, I can’t even begin to describe how amazing it was to not be the one in charge of planning. I didn’t have to worry about how to get from point A to point B, and that mental freedom was HUGE for me. It meant I could focus on actually enjoying my time in India and experiencing it to the fullest, rather than stressing over the little things.

  • You’ll make lifelong friends. The friends, man, the friends. Where to begin? Firstly, the friends you make on a group tour are not like regular friends.. they’re more like an instant family. It becomes way easier to connect with people, because you already know you have something in common - a love for travel!. That means there’s never a lull in the conversations, and yeah maybe your bucket list will become way longer than it was prior to the trip, but that’s never a bad thing, eh?

  • You will gain new perspectives and learn about many different cultures. We had people from 6 different countries on the tour. That meant we learned so much about not only India’s culture, but each other’s too. It also meant we got to experience the occasional hilarious language barrier (“you need to shart??? oooooh, you mean shOWer”), which always left the whole group in tears laughing over.

  • There’s safety in numbers. Traveling solo as a female can seem daunting in certain countries, but being surrounded by a group of people definitely helps put your mind at ease. You know that when you’re out walking around in the streets, there are other people typically keeping an eye on you, and you doing the same for them. And even on the free days where you have the option to choose what you want to do, with a big group you’re pretty much guaranteed to find someone who wants to see or do the same things as you, so you’ll never have to be alone!

Cons:

  • A lack of sleep. You do have to sacrifice some beauty sleep, but honestly, who needs that? I’d choose seeing the Taj Mahal at sunrise over getting to sleep a couple extra hours ANYDAY.

  • You’re on a set schedule. That means you have a maximum of 1-2 hours at each place, so it can feel a bit rushed at times.

  • Limited privacy. If you like your personal space, then you can always request to book a private room, but otherwise you’ll be sleeping in a hostel dorm room with the other group members.


agra hostel.JPG
265A8974 copy.jpg

Accommodation

Since the tour is very much a backpacker-focused trip, the accommodation was split between hostels, overnight trains, and 1 night camping in the desert. Personally, I felt like the hostels only got better and better as the trip went on. Many of the hostels we stayed in were “Zostels”, which is a very reputable accommodation option in India and had a super chill vibe to.

As with all accommodation options, there were pro’s and con’s to each hostel, but overall they felt very safe, had great chill-out spots, and the rooms were comfortable which is all you really need. The Zostel in Udaipur also had the BEST food and cheapest prices of anywhere I ate during the trip (180 rupees for paneer butter masala!), soooo yeah, hostels rock.

That said, you shouldn’t expect certain luxuries when staying in hostels as a backpacker - especially hostels in India. Don’t expect the wifi to be the strongest, and there’s a very good chance your showers will all be cold, but that’s a small price to pay for a safe, inexpensive place to stay!


Transportation:

Trains, planes, and automobiles. Literally. Transportation is one of those things that make me want to rip my freaking hair out when I plan my own trips. I get confused, I don’t know when to negotiate, and I get stressed. Dom likes to call me “Stressica” in those situations, because I turn into an anxious mess. BUT, good news is, The Dragon Trip took the planning right out of my hands, which made Stressica oh-so happy.

india tuk tuk.JPG

All the transportation was pre-organized for us, so getting from A to B was pretty easy (except for those pesky cancelled trains… oh, India!). We had 3 overnight trains between cities, a couple buses, 1 airplane, a handful of rickshaws, and occasionally our own two feet to get us from place to place.

Overnight Trains:

Since the trip is geared towards budget backpackers, they help keep the costs low by making the most of sleeper trains between cities. If you’ve never been on a sleeper train before, it can feel pretty hectic and at times overwhelming, but if you keep a positive mindset, it’s a crazy fun adventure. You have your own bunk on the train, and they provide a pillow and sheets for you.

Here are my best tips for actually ENJOYING an overnight train:

  1. Bring a couple sarongs/scarves. They double as sheets, pillowcases, curtains, covers for your valuables, eyepatches, etc.

  2. It gets COLD. Make sure to have a sweater handy, because they crank the AC on those trains.

  3. Keep your valuables on your bed with you. I kept my smaller backpack and camera bag by my head, because you can never be too careful. There are people coming on and off the trains constantly, so if you want to sleep, you gotta also be smart. Passports, laptop, camera stuff, phones, and money should all stay near you. The rest can stay in your big backpack beneath your bed.

  4. Consider a sleeping pill. I felt a bit like a black market pharmacist during those train rides, handing out my sleeping pills to the rest of the group. But, if it helps you get a peaceful 8 hour snooze on the train, it’s worth it.

  5. Don’t breathe in the bathrooms. Seriously, this is a big one. Hold yo breath!!! There are usually both sqautty potties and western toilets on the train, but neither are very lovely. Flip flops are NOT recommended.

  6. Bring earplugs. There are men walking up and down the aisles selling breakfast, snacks, and Chai, so if you don’t want to be woken up to the constant drone of “CHAAAAIIIIIIII, CHAAAAIIIIIIII”, then use some earplugs.

  7. Actually try the Chai though. It’s good. No, it’s amazing, and it costs 10 rupees (15 cents-ish).

  8. Maybe don’t trust the food. I would bring your own snacks to be safe. You really don’t want to get sick and have to spend the whole train ride in those toilets…..

  9. Remember that Indian schedules can be slow. There will be delays, and cancellations, and just general slowness, so it can take a bit longer than anticipated to get places. Don’t let that frustrate you. It’s all part of the journey.


Food:


There were a few meals included in the itinerary, but for the most part, we paid for our own meals on the tour. I personally like tours like this, because I enjoy choosing my own food and trying new dishes (and also the added perk of being able to pick cheap options!).

The great thing about India is that mostly all menus have both vegetarian and non-veg sections. Because a substantial portion of the population in India are vegetatian, you’ll find that the veggie meal options are endless, not to mention delicious. If you’re a big meat-eater, don’t expect to find much beef, as killing cows is actually illegal in India.

Most menu items average around 300 rupees per meal, however, it can be more or less depending on the luxuriousness (or lack of) of the restaurant you’re at. If you want a meal + rice + naan bread + a drink, you’re looking at roughly 500 rupees (just over $6), so not too shabby at all for food coma-worthy food.

My personal favourites that you MUST try are:

  • Paneer Butter Masala

  • Dal Tadka,

  • Tikka Masala

  • Spinach Pakora

  • + you have to get the homemade naan bread with all your meals. Don’t skimp on that!!


Costs

All in all, the 13 Day North India tour costs $789 - or $710 with my discount code (backpackwithme/TDT19) - which is pretty amazing considering it includes all accommodation, transportation, tour guides, and some activities & meals.

There are some extra activities that you have the option to partake in (hot air balloon ride anyone?), but those are paid out of your own pocket, so totally optional!

You can view & book the 13 Day North India Tour here, and view all other tour destinations here. And if you use the code above, you’ll get 10% off any trip.


Packing for a two week trip:

  • Backpack: the most essential item of them all. I have an Osprey Farpoint 55L (40L with a detachable 15L backpack), and it’s the perfect size for a few weeks around India. The Farpoint is geared towards men, and the Fairview is for women, so keep that in mind if purchasing. I did not…. whoops LOL!

  • Good walking shoes: you do NOT want to walk around the city streets in flip flops, nor have to use a squatty potty without having your feet totally covered… trust me on that one!

  • Quick dry towel: a microfiber towel will be a lifesaver when staying in hostels. They also double as a pillow if needed on a night train, so double win.

  • Scarves: You don’t really have to pack them because they sell scarves for $1 at any market/store in India, but they are great for everything. Covering up your shoulders, blankets on the night train, hair covers for temples, wiping sweat… literally so many uses.

  • Medicine & Wellness: immodium, motion sickness pills, hand sanitizer, & earplugs are my own personal essentials.

  • Culturally appropriate clothes: I packed quite a few long skirts & dresses that cover the knees, t-shirts, loose-fitting pants (bring a few pairs), scarves & sarongs, 1 sweater for the overnight train, and 1 sleeveless top for the desert.

Pre-Departure Tips:

Travel Insurance

Travel insurance is something that some people don’t always see the necessity in getting, but if you’re a seasoned traveler, then you likely know first hand just how vital it is to take out. No matter how careful of a traveler you are, minor mishaps will happen to you, and they have the power to ruin your whole trip if you’re not prepared.

Travel insurance protects you from situations like these, and helps to alleviate the costs and stress that may arise. My go-to insurance provider is World Nomads, because they offer the best coverage i’ve seen, and they also allow you to take out insurance while you’re already traveling (which is great for digital nomads or last minute planners!).

Visa

If you’re planning a visit to India, you will most likely need to get an e-visa. This is something you must do BEFORE your trip, as you won’t be able to get a visa on arrival. As an Australian citizen, I was able to get a 12 month multi-entry tourist visa, which means I can visit India as many times as I like, as long as each trip doesn’t exceed 90 days. Pretty darn great if you ask me! It took 48 hours to get once I submitted my application and paid the $100 fee, so it would be wise to apply for your own visa a week before your trip.


Practical Travel Tips:

  1. Bring toilet paper with you, everywhere. Most public bathrooms in India won’t have toilet paper handy, so save yourself the stress and just carry it around with you.

  2. Don’t drink the tap water. You may see locals drinking it, but their stomach’s can handle it, and yours likely can’t. Always go for bottled water unless you want to spend the next week bent over the toilet.

  3. Be wary of street food. Same goes for cheap food. If it’s not cooked fresh, then you may end up with a case of the good old Delhi Belly, and that’s a sure fire way to ruin any trip!

  4. SIM cards are pretty easy to get, despite what you may have been told. My Airtel SIM cost 500 rupees ($6), and gave me a daily usage of 1.5GB. It also gave me crazy good coverage - even out in the middle of the desert! Some helpful apps to use while in India: Maps.me (works offline too!), Google Translate, Hostelworld, Currency App, Uber.

  5. Be aware of pickpockets. Don’t keep anything in your back pockets, and if you’re walking around with valuables in your backpack, wear it on your chest. Yeah, you may look like a dum dum, but you won’t get your sh*t stolen.

  6. Know that personal space isn’t the same as it is in the Western World. You will get stared at, and people will get all up in your grill. Don’t let it get to you.

  7. Consider vegetarianism during your trip. Opting for vegetarian meals is often a lot safer than eating meat-based meals, and they’re all freaking fantastic, so just a thought! I loved the veggie food so much that after returning from India I decided to cut out meat completely and only eat vegetarian from now on.

  8. There are a lot of scams & beggars. I know it’s sad, but a lot of the beggars you see (including the women with babies, those with severe disabilities, and even the kids tugging at your heartstrings) are part of organized “gangs”, where the money you give them will go to a ringleader.

  9. Don’t expect things to be on time. You should expect train delays or cancellations, food orders to take quite a while, and pretty much everything in between to have a delay of some type. It’s just a way of life, and being able to accept that will save you lots of frustration.

  10. Look out for re-sealed water bottles. Some people will re-fill empty water bottles with tap water, and then try to sell them to unsuspecting tourists. Double check the seal to make sure it’s actually mineral water, or else you may find yourself getting sick.


If you’re interested in my full 13 day India itinerary, check out my blog post here. And if you have any other helpful tips for India, I would love it if you could share them below in the comments!

TRAVEL GUIDE_-17.png

Ultimate Travel Guide to Zakynthos

 
shipwreck_beach_view.JPG

Do you ever stress out about money and then accidentally book a flight to Zakynthos? No? Just me then?

England has been lacking in sunshine lately (shocker, right?), so after a last-minute change in our schedule, Dom and I decided it was time to embark on an impromptu island getaway.

Lucky for us, cheap flights from London are extremely common - you’ll find a flight to another country costs you less than a day of parking in London, which is total madness in my book!

So when it came to booking our own little vacay, we had a few necessary criteria: cheap tickets, sunshine, and baby blue water.. or just water of any kind really.

IMG_3168.PNG

After scouring the web for budget deals, we settled on our two favorite options: Mallorca or Zakynthos (otherwise known as Zante). We then did what any normal person does when they need to make a tough decision - we let the Instagram Gods decide. In other words, I put a poll up on on my story, 68% of people chose for us to go to Greece, so that was that. I booked our flight right then and there, and bing bang boom, we were in the air a few days later!

First things first, if you’re thinking of a Greek Island getaway, I can well and truly vouch for Zakynthos being put at the top of your bucket list. It has everything you could possibly want:

  • Blue water, CHECK

  • Turtles, CHECK

  • Amazing beaches, CHECK

  • Drool-worthy food, CHECK

  • Freaking epic viewpoints, DOUBLE CHECK

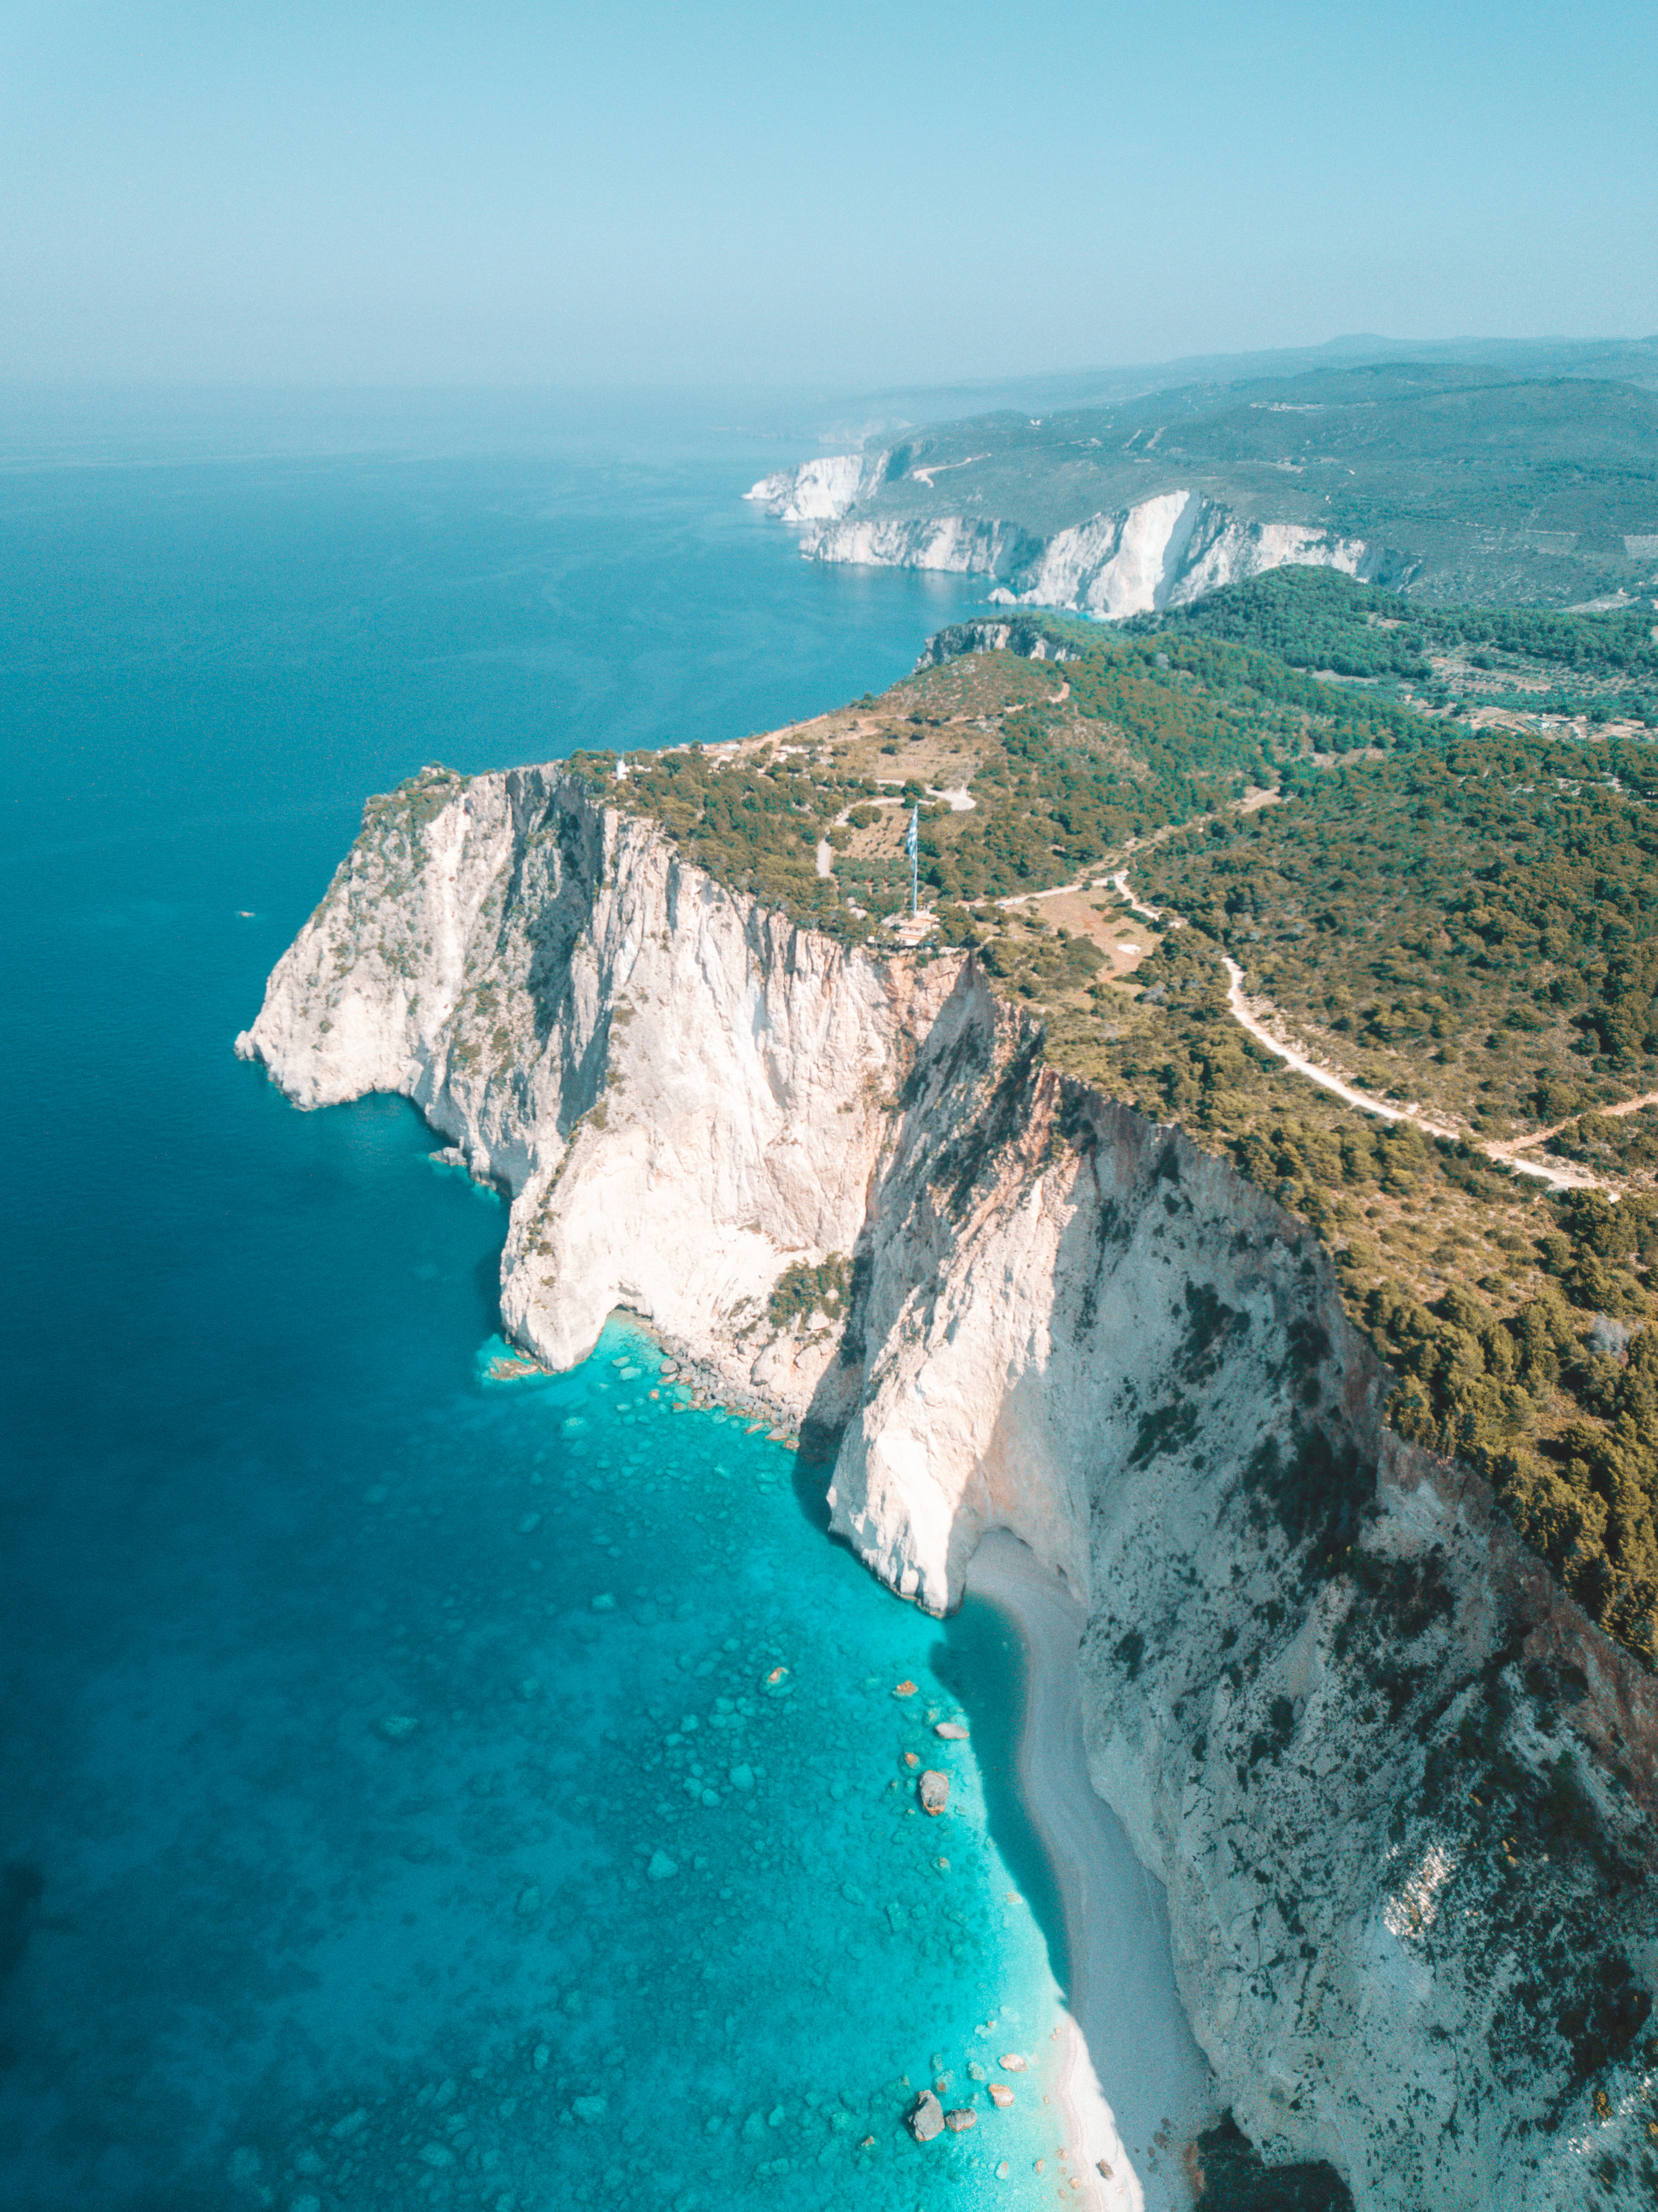
And while everyone brags about Zakynthos for its ever-so-famous Navagio “Shipwreck” Beach, it honestly has so much more to offer than that one view. We spent a full week on the island and got to see so many secret spots I never knew existed, so if you love yourself an adventure, get your butt to Zante ASAP!

turtle_island_zante.JPG

WHEN TO VISIT ZAKYNTHOS

Zakynthos in June is, in my opinion, the prime time to visit the island. It’s just entering summertime, so the prices aren’t soaring yet, but the weather is still a solid 30 degrees Celsius and sunny most days. Too hot for some, but sweltering is my personal favorite type of weather because, well, i’m a freak. I must have been a desert lizard in a past life.

While July and August are both hot (or uncomfortably hot by some people’s standards), those months are also the peak of summer and extremely busy for tourism in Greece. Prices will be on the rise and there’s a good chance you’ll be sharing viewpoints with quite a few other peeps, which isn’t my cup of tea, but still not a dealbreaker for most people.

Pro Tip: If there’s a specific beach or viewpoint you want to see in absolute serenity, visit between the crack of dawn & 8:30am. It will pretty much guarantee peace and solitude (until the coach buses turn up), so you can still get your insta pics with ease. The sun also rises ridiculously early over the summer, so if you want that golden hour lighting, you’ll need to set your alarm for a fun 5am to give yourself enough driving time.

DJI_0005.jpg

HOW TO GET TO ZAKYNTHOS

Depending on where you are in the world and what kind of trip you’re on, you have a couple different choices on how to get to Zakynthos.

By plane

DJI_0220.jpg

Since the island has its own airport, it means it can be incredibly easy to get here from big hub airports like London or Rome. A roundtrip direct flight from London - Zakynthos cost us £108 each, or just under $140 USD on a budget airline like TUI. Not too shabby if you ask me! Another awesome option is to check out TUI holidays - we didn’t book in time before the prices rose, but they honestly have some epic deals on flights + hotels if you look at the right time of year. We missed out on a £200 booking for roundtrip flights AND 7 nights of accommodation, which seems like an insane deal for a week in paradise.

By ferry

If you’re more into island hopping, then the ferry will likely be your best bet. You can catch a 1 hour ferry from the port of Killini, which is about a 3.5 hour bus trip from Athens. You can also easily get between the neighboring island of Kefalonia and Zakynthos via ferry, so it’s a great option for either a big day trip or for continuing your island hopping adventures. I didn’t take the ferry myself though, so I don’t have any experience with prices or the best ferries to go with - Google will have to help you from here!

WHERE TO STAY IN ZAKYNTHOS

Where you stay is fairly crucial, and choosing the wrong accommodation can literally make or break your trip.

For those of you who want to stay in a more lively, party-focused area, Laganas is the place to be. It’s a neighborhood of clubs, cheap eats, tour agencies, a weird amount of emergency rooms, the occasional strip club, and the only McDonalds on the island. And if that doesn’t sound appealing to you (in all honesty, it didn’t sound too great to me), there are still places in Laganas that remain peaceful if you simply look at accommodation in the surrounding area.

Travel Tip: All the pools in Laganas are open to the public if you buy a drink there - yes, even the hotel pools!

For our week in Zakynthos we stayed at a quiet little homestay called Helen & Theo Studios on a side street in Laganas. It was about a 2 minute walk from the main strip, so close enough for food but far enough away that we didn’t have to hear the clubs. It was PERFECT. The homestay is a gated property full of fruit trees, flowers, and cute kitties in every direction you look, so if you like animals, you’re going to love this place.

IMG_2101.jpg

The owners are a little Italian couple who speak very basic English, but are honestly the friendliest people on the planet. Every morning Theo would greet me with a giant smile on his face, shake my hand, and pluck a flower from the garden for my hair.

If you want more of a quiet, laid back vibe for your holiday, then i’d suggest looking at hotels around the Vasilikos area. It’s well-suited for couples and families who want beautiful beaches nearby yet prefer peace and quiet over pre-drinks and parties. While I loved staying at Helen & Theo’s, I think next time we’ll look into accommodation in the Vasilikos area for a little extra serenity.

HOW TO GET AROUND ZAKYNTHOS

When it comes to getting around the island, you have a few options depending on your preferences.

quad bike

One of the most popular transportation options is to rent a quad bike for a couple days, not just because you will undoubtedly look super cool riding a quad, but also because it’s incredibly practical. There are some seriously rocky roads on Zakynthos, so having a quad bike to get you up and down them can be a lifesaver.

rental car

Getting a rental car is my personal favourite way to get around the island, which is what we opted for. We wanted to be able to take all of our stuff out with us for the day (like our awesome new pizza floatie, camera equipment, and of course, snacks), so a rental car gave us the ability to make the most of each day without having to leave stuff behind.

The cost is roughly $30/day including insurance, and you should always make sure to take out insurance on it. There would be nothing worse than being slapped with a $500 fee at the end of your trip for a tiny minuscule scratch. We booked our rental car ahead of time through a company called Goldcar, and the pick up/drop off was right across the street from the Airport which made our lives a heck of a lot easier.

coach bus

There are also tourist coach buses that can take you to the most popular spots around the island, but I personally prefer to have my own mode of transport so I have the freedom to explore at my own pace.

WHAT TO DO IN ZAKYNTHOS

Mizithres Viewpoint

zante_viewpoint.jpg

Oh Mizithres, you are a beauty.

If you want to find this spot, your only hope will be trusty old Google Maps, because you’ll find there are approximately zero signs for this viewpoint. The directions took us to the base of a very rocky dirt road, and we figured it would be best not to risk the tires on our rental car. So we parked at the bottom and trekked the rest of the way on foot - approx 0.5 miles, so pretty easy breezy.

Once you reach the viewpoint (located at a bend in the road), there are again no signs, fences, or regular vantage point, so you’ll just have to peer over the edge to see the view. With that said, please don’t be stupid and run around by the cliff edge. It’s an extremely large cliff, and one misplaced step can mean your life. Sorry to take this from 0 to Mom Mode real quick, but a cool photo is not worth your life.

Fun Fact: the beach down below is new, as it was formed last October due to a landslide resulting from an earthquake.

zakynthos_beach.JPG

Hire your own boat to cruise around Turtle Island + the southern caves

keri_caves_zante.JPG
DJI_0200.jpg
DJI_0198.jpg

I was very surprised to learn that you don’t need a boating license to hire your own boat for the day in Zakynthos. While I wouldn’t trust myself to drive a boat for the first time on my own, I luckily had Dom who is talented at anything and everything - including driving a boat.

You can rent a boat from a few different areas on the island, but for this particular day, we drove over to Keri Beach and found a boat rental company that cost us $120 to have the boat from 10am-6pm. Our day started out searching for elusive turtles in the bay, drifting over to Turtle Island for some sunbathing and snorkeling, then floating our way around the coast. If you want the ultimate view, make sure to check out the area near Keri Caves. The steep limestone cliffs tower over you impressively, and the water below is crystal clear and perfect for swimming in. It definitely left me at a loss for words.

Filipoi Beach

I actually found this beach using the Satellite View feature on Google Maps! I love to find “off the beaten path” spots, so I started searching the map looking for hidden bays with blue water.

This beach is just a quick 10 minute drive from Shipwreck Beach Viewpoint, and the drive takes you through a cute little town called Volimes (which I also recommend taking a stroll around at some point), and then down a windy cliff to this rocky bay. I’d recommend visiting either in the early morning around 8am, or in the evening from 5pm onwards, because you’ll likely have the bay completely to yourself!

filipoi_beach.JPG

Boat tour to Navagio Beach and the Blue Caves

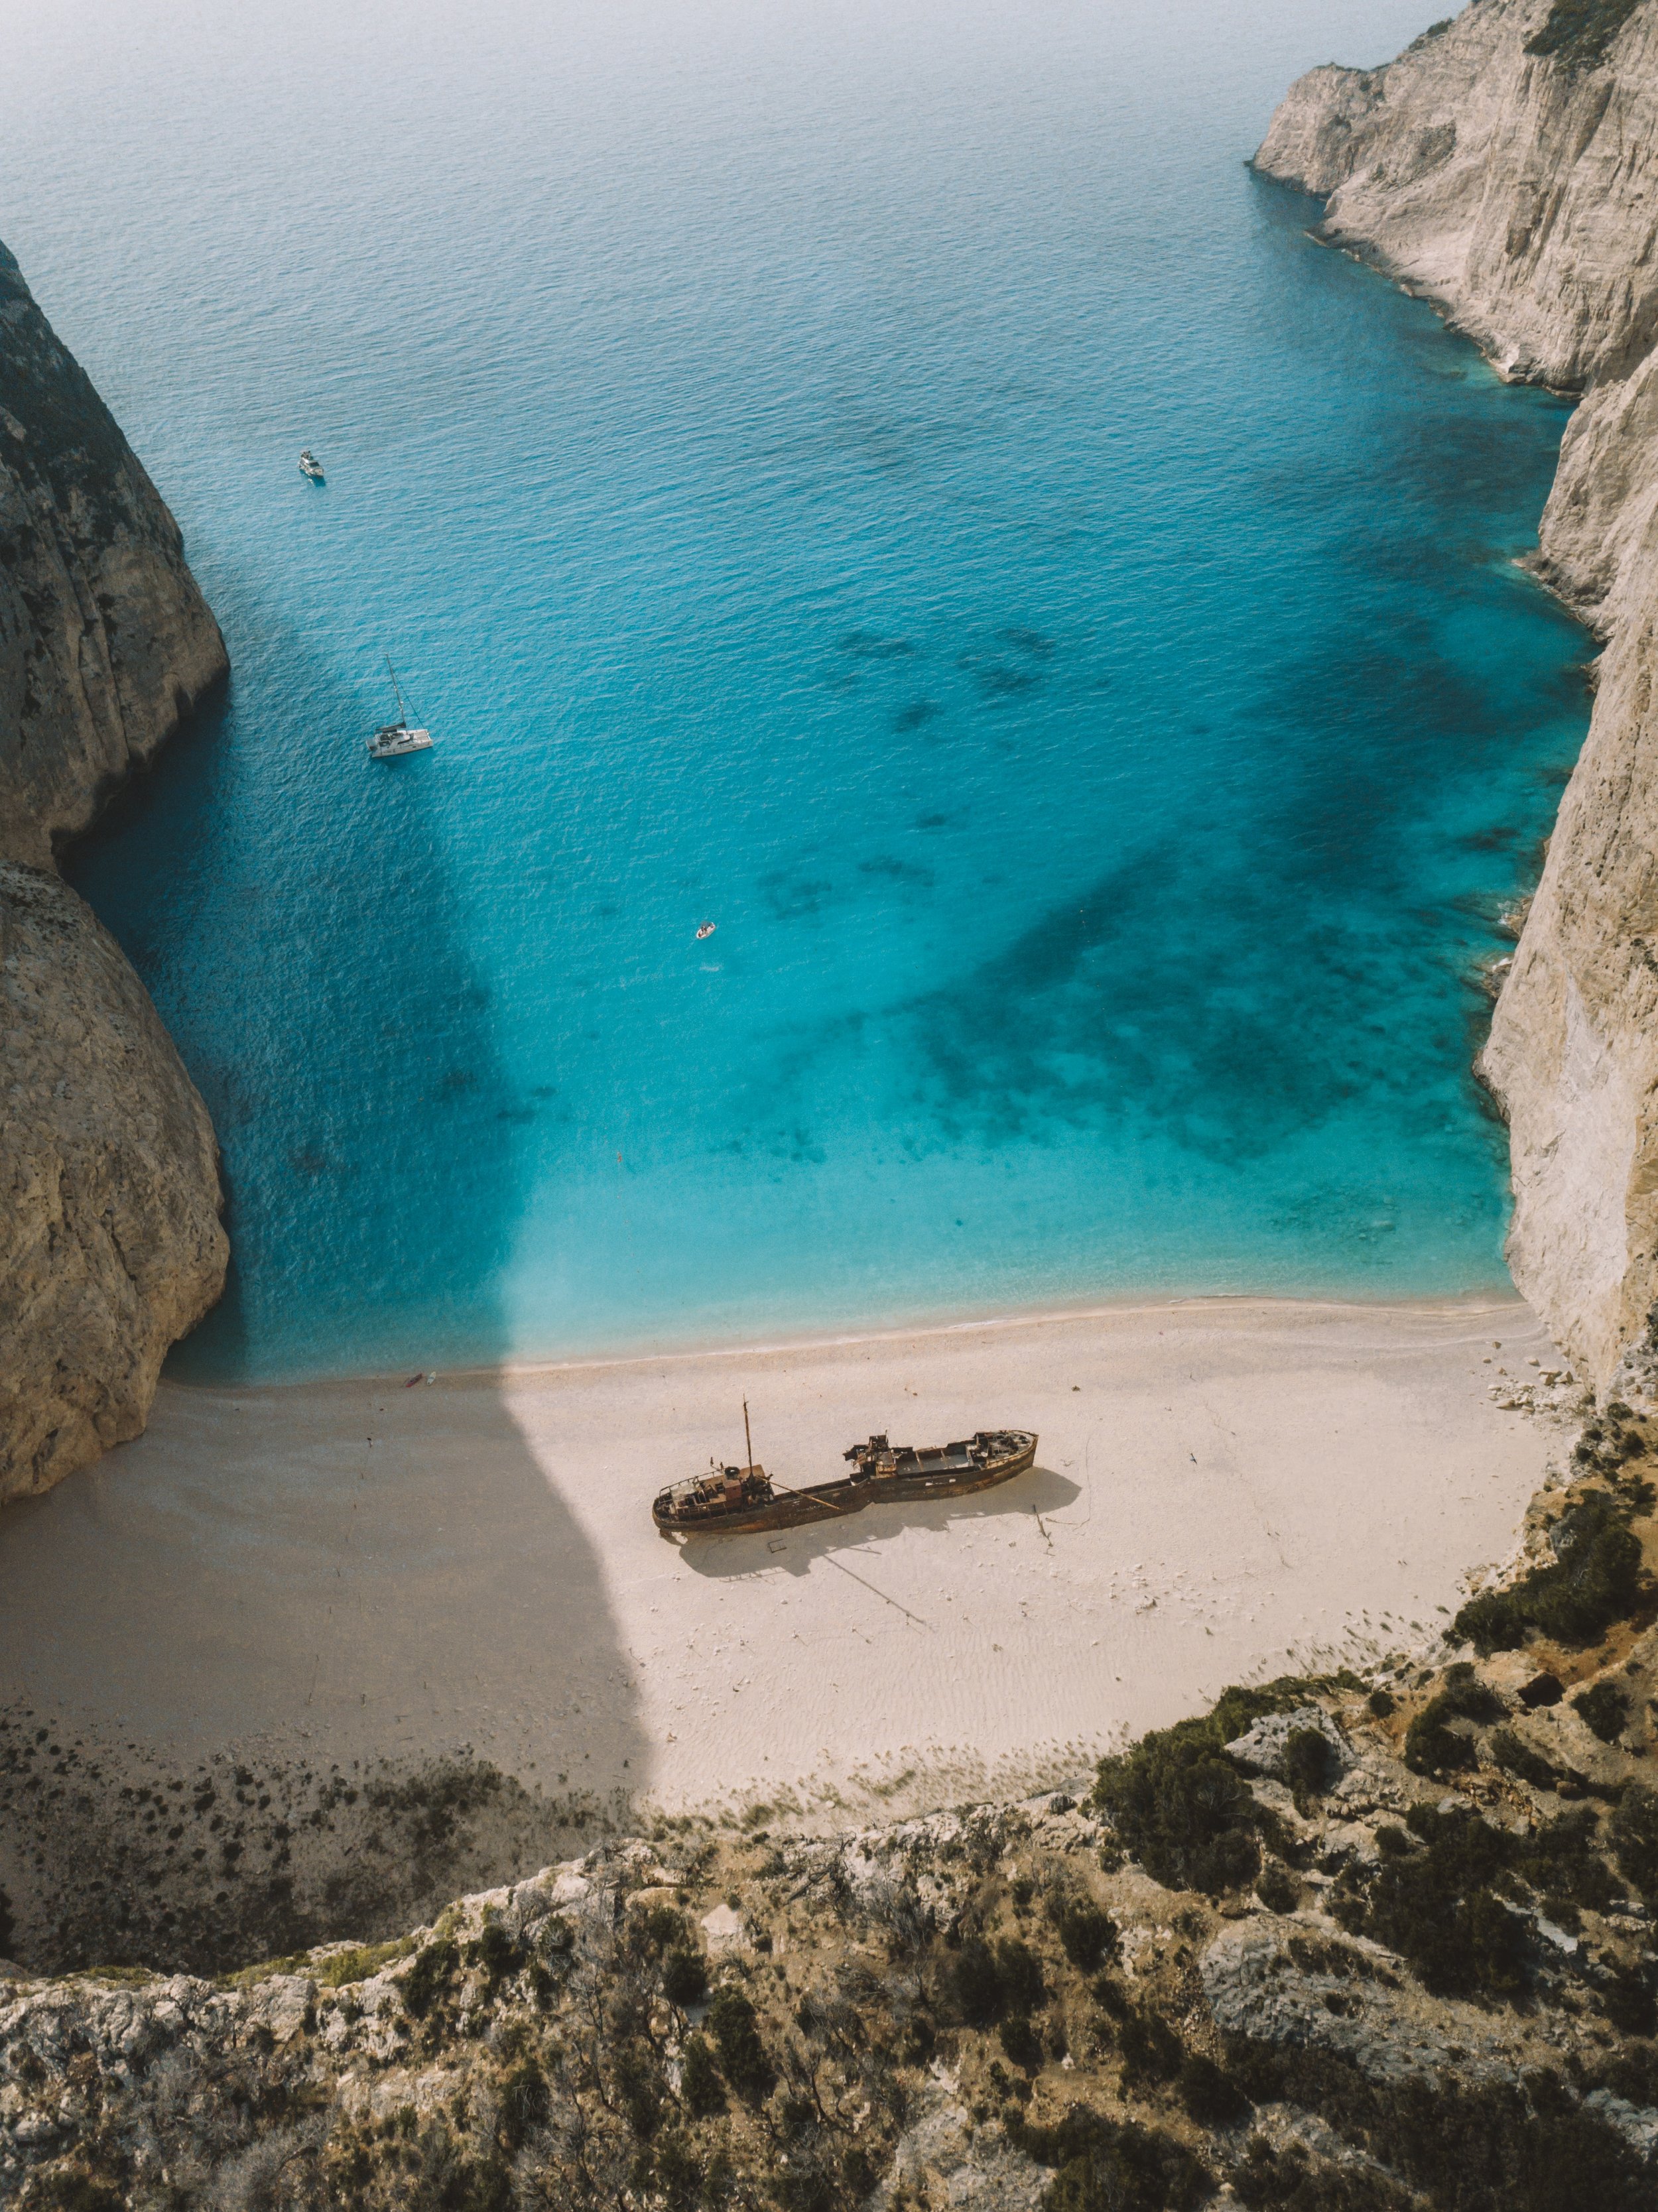
Okay okay so I couldn’t complete this list of must-do’s without mentioning Navagio, because it’s one thing to see it in photos, but a whole other experience to see it in real life. For the ultimate day out on the water, we rented another private boat at Porto Vromi Marie through Explore Zakynthos, and set sail with Dom as my trusty captain.

shipwreck_beach.JPG

It took us about 20 minutes to reach Navagio, and while we didn’t end up going onto the beach itself (we were totally freaked out at the thought of our boat drifting away!), you still get such an epic view by anchoring in the bay. I swear i’ve never seen more impressive water in my whole 26 years of life.

We arrived around 1pm, but I think the prime time is either early morning around 9am, or in the evening around 6pm, as you’ll be one of the only boats there. Do yourself a favor and don’t look up though! You’ll see tourists up above standing frighteningly close to the cliff edge, which tied my own stomach into knots.

After Navagio, we decided to cruise all the way to the Blue Caves which took us another 30 minutes or so to reach, but boy was it worth it. These caves are utterly stunning. The water surrounding the caves literally sparkles in the sunlight, making for some gorgeous photos!

blue_caves.JPG
6N9A6255-2.jpg

Navagio “Shipwreck” Beach Viewpoint

If you search for Zakynthos on Google or Instagram, 9/10 photos will likely be of this viewpoint. It’s beautiful, it’s impressive, but holy heck is it dangerous!

A few mentions:

  • Bring water - it gets so hot, and there is no shade on the top of that cliff, so you will 100% want water with you.

  • Wear sneakers (or trainers if you’re British) - seriously, wear fckn shoes. I saw people in flip flops. I saw people barefoot. I saw people in freaking high heels. But in all honestly, not wearing sneakers/trainers is just plain idiotic.

  • Be careful. I watched tourist after tourist messing about near the edge, tripping over rocks or their own flip flops, accidentally bumping into another person while taking a selfie.. it’s scary how careless people can be when they’re a foot away from imminent death. I wish I was exaggerating, but I had messages in my inbox from people who have had friends die at this viewpoint, so it’s no joke. BE SMART!!!

DJI_0244.jpg
navagio_beach.JPG

walk around the town of volimes

If you want to experience a quaint little Greek town, I recommend taking a stroll through Volimes. Unlike some of the other towns it didn’t feel touristy, yet there was beauty hidden around every corner. You’ll see cute ivy-covered houses, cats basking in the sun, and alleyways lined with flowers, so bring the camera for some photo ops!

zakynthos_town.JPG
zakynthos_town1.JPG

Porto Limnionas

Another must-visit spot in Zante is Porto Limnionas. Located on the west coast of the island, it takes roughly 30 minutes to reach by car from Laganas. I think it’s pretty self-explanatory why this place is such a popular spot, so i’m going to simply let the photos do the talking!

GOPR8061.JPG
IMG_2137.JPG

Korakonissi

I was genuinely shocked that more people haven’t discovered the beauty of Korakonissi. We were a few of the only ones there that day, so we spent the whole morning jumping into the bay, snapping photos doing less-than-graceful said jumps, and sunbathing on the rocks. The turquoise-green water is a nice contrast to the vibrant blues in other spots, so it quickly became one of my favorite places to photograph.

6N9A7148.jpg

water sports at st. nicholas beach

Last but not least, if you’re traveling with kids or simply want a day of fun in the sun, then you’ll definitely want to add water sports to your itinerary. St. Nicholas Beach is located in Vasilikos, and offers paddle-boarding, jet-skiing, pedalos, canoes, diving, banana boat rides, parasailing - you name it, they have it. The beach also has a few restaurants, bars and sun beds for hire, so if you’re not out on the water you can always grab a drink and lounge by the waves.

other places worth a visit if you have time

Xigia Beach

Hidden Treasure Cave

Potamitis Windmill

Porto Vromi Maries

Flat Rocks

Porto Roxa

WHERE TO EAT IN ZAKYNTHOS

souvlaki.JPG
zakynthos_greek_food.JPG

You can’t go to Greece without trying the traditional food. From traditional kebabs, to Saganaki cheese, to fresh seafood, you’ll be sure to find a food you don’t want to live without ever again.

CHEAP EATS

If you’re staying in Laganas, there are cheap eats in every direction you look. Just a quick stroll down the street will take you past countless €2 souvlaki stands and €1 pizza slice signs, so if you’re not afraid to scarf down the carbs, then you’ll be all set for cheap meals.

Ionio Restaurant

For a more authentic Greek dining experience, I highly recommend heading over to Ionio Restaurant & Beach Bar in Vasilikos for a sunset dinner. If the ocean view doesn’t convince you, then their menu sure will.

We went a bit overboard on appetizers and ordered oysters, Greek salad, bruschetta, fried zucchini, and a small bottle of ouzo to get us started, and I think I died and went to food heaven. For our main course we shared a massive seafood platter topped with octopus, sardines, anchovies, calamari, and way more, and by the time we headed home for the night we were well and truly stuffed!

ionio_restaurant.JPG
zakynthos_restaurant.JPG

If you have any other questions about Zakynthos that I haven’t answered above, please leave a comment below so I can help!


VanLife Saga: Why We Moved into a Van

6N9A4927.JPG

At this very moment while I type this, i’m sitting in my office with a cup of coffee to my left, the door open to a grassy daisy-covered view, some Xavier Rudd background music, aaaand…. i’m in the back of a parking lot.

YUP, you guessed it - i’m in my van-home. Some people think me and Dom are crazy to live in a van. Others think we’re full blown hippies. But we like to think we’re living a pretty rad life.

vanlife park.JPG

So it’s time I wrote a blog on WHY we decided to move into a van.

After our 2018 travels came to an end, we knew it was time to have a home-base. We wanted somewhere to call home, but also somewhere we wouldn’t have to spend oodles of dollars on while we weren’t even there.

Since we loved the “#vanlife” in Australia so much, we asked ourselves, why not do it full time? We’re pretty simple people - neither Dom nor I have many belongings, we like easy meals, and we’re not fussed on things like long showers or AC, so it seemed like a no-brainer.

A few other perks of moving into a van:

  • We save roughly $200 USD on rent per week (that’s over $10,000 per year)

  • We can bring our home on all of our road trip travels and not have to worry about accommodation, ever.

  • We have the freedom to travel where we want, when we want.

  • When we do have trips (without the van), we don’t lose money on rent.

FINDING A VAN & THE BUILD:

In February 2019 when we made the move over to London, we took the plunge and purchased our very own van-home (and yes we’ve already created an Instagram for it like some sort of embarrassing new parents). We searched high and low for a while with a max budget of £4,500 pounds ($5,700 USD). Our main requirement was it being a high-roof van, long wheel base or XL wheel base, not too old, with a good mechanical history. After a few weeks of scanning the internet, we found our dream van… a big red ex-Royal Mail 2013 Mercedes high-top Sprinter. So not only do we drive a Mercedes Benz, but we also live in one. #Winning.

Van Cost: £4,200

We settled on a design after lots of Pinteresting, and then got to work on transforming it into a DIY livable space. That process needs a whole Blog Saga of its own though, so for now, I'll just show you a few transformation shots! Keep in mind it’s not totally finished, as it still needs cupboards, windows, new foam, a kitchen area, shower, and finished flooring, but it’s homey for now. My estimate that the total cost will come out to be roughly £10,000 (which if you read above, is almost the same as what we will save this year on rent).

van conversion side.png
van conversion back.png
van conversion.png

A few of the major van life essentials we’ve discovered while building our little home-on-wheels have been:

  • A comfortable bed/foam. We talked to a LOT of other van lifers to get recommendations, especially since we were planning to use pre-cut foam rather than getting a mattress. We soon decided our foam was slightly too thick for our liking, so we’re switching from 6” foam to 4” pretty soon.

  • A heater AND a fan. England weather can change at the drop of a hat, so we have both on a thermostat to keep ourselves cozy no matter what the weather.

  • SOLAR POOOOWEEERRRR! I freaking love solar. We have one 200W solar panel as of now which powers our laptops, phones, lights, etc, but i’m guessing we’ll need to add another once our fridge and boiler are installed.

  • A toilet. You can’t just pop a squat wherever you want in England, especially while stealth camping, so having a toilet in the van is a lifesaver. We have a chemical Thetford porta-potti which has been an awesome purchase so far.


ANSWERING YOUR van life FAQ’s

Where do you park at night? Is it legal?

At the moment, we are stealth camping around the suburbs/outskirts of London. Since we pay U.K. road tax, we are legally allowed to sleep in the van, granted we’re not parked illegally (or on double yellow lined roads). We still like to keep to ourselves though and not draw attention to the fact that we’re living in the van, so we usually prefer dead-end roads or on quiet neighborhood streets, and we move location each night. Here are some of our criteria for a good van spot:

  • Flat

  • Not directly in front of someone’s house

  • On a quiet street

  • Decent internet signal

When we’re traveling, we use apps like Park4Night and iOverlander to find free parking spots or the occasional camp site if we’re in need of laundry and/or showers.

Where do you shower?

This week we’re getting a membership at the local gym for £23 per month so we can use the showers there (until we’ve finished the one in our van). Up until now, we’ve either used the showers at camp sites or at Dom’s family and friends homes. We are basically giant freeloaders at the moment so hopefully they don’t hate us yet LOL.

Where do you go to the toilet?

We have a small porta-potti toilet in the bathroom of our van! The goal is to only pee in it, but if one of us has an.. uhh.. emergency bowel movement and there’s no public toilet nearby (or it’s the middle of the night), the rule is that they have to empty it the next time around. I know some people don’t want to hear about our bathroom habits, but for those of you truly interested, we also utilize public bathrooms on the daily. Eventually, you get in the habit of looking for public bathrooms and using them when they’re available. McDonalds and large supermarkets are almost always a sure thing. It’s honestly way easier to get used to than it seems!

Where is all your stuff? Where do you store the rest of it?

Beneath our bed/bench seats we have deep storage boxes with lids that lift up, and we also are planning to put overhead cupboards in next month for clothes, food, etc. We don’t have a lot of stuff as it is because traveling so often has forced us to live minimally. We both store things at our parents homes, and have miscellaneous things (tools, winter clothes, fancy clothes, suitcases, etc.) with Dom’s grandparents too. While having a storage unit would be nice, it’s too pricey for a few random bits and pieces.

Are you living in it full time?

You better believe it! We moved in before it was totally finished (not the smartest idea, but we’ve made it work), and have been living in the van for 11 weeks now.

Do you cook in the van? Is it easy to make meals?

We do! We don’t have a fridge or an oven right now which makes cooking a little more challenging, but that’s all part of the adventure. Some of our favourite foods are simple dishes cooked in a wok, so we just use our gas burner stove to cook all our meals on. Some of our favourite meals are: curries, veggie burgers, ramen noodle bowls, Mexican wraps, and the occasional (weekly) chip and gravy sandwiches.

Did you do the whole van build yourselves?

We sure did. I can’t take any credit though, because I was just the assistant to Dom. It DEFINITELY helped that Dom’s a qualified and experienced carpenter, so he knew how to do pretty much everything from the insulation, to the walls, to flooring, lighting, power, and plumbing. He’s pretty damn amazing if you ask me, but i’m biased. As for myself, I did a pretty decent job of painting and handing him things lol.

How do you keep all your stuff charged?

Solar baby, solar. We have one 200W solar panel mounted on the roof, and honestly, it’s been more than enough to power everything up. I figured England wouldn’t give us as much solar power since it’s cloudy more often than not, but our battery is on 100% every morning and has never even dropped below 60% yet. We’ll see how things go once we get a fridge and water pump in though.

How long do you think you’ll live in the van for?

Hmm tough question - definitely for the foreseeable future. We really want to ship it over to Australia in a year or so if we can get our visa sorted out, so fingers crossed that pans out and we can continue living in it over there for a few years!

Do you feel safe?

Most definitely. We still use our common sense and don’t park anywhere that seems sketchy, although tonight Dom did want to park down a shady alleyway where squatters were hanging out LOL. Since we’ve been in residential neighborhoods around London lately we feel totally safe sleeping here.

How do you make money?

The question everyone is always dying to know! We do a little bit of everything. I do freelance photography, social media consulting & management, content creation, web design, brand collaborations, and other random bits and bobs that come up, while Dom does a mixture of photography, videography, and his regular flooring job. We definitely aren’t rolling in cash, but we also love our lives so that’s the important thing, right?!

What are the biggest challenges?

Oh the challenges! While the #vanlife hashtag on Instagram shows jaw-dropping window views, super chill vibes, and lots and lots of vegans, you can bet your bottom dollar the reality is not always that pretty. What you don’t see on social media is driving around trying to figure out where to shower when you’re on Day #4 of no bathing and you’re starting to smell a bit like a dumpster.

A few of my least favorite parts are:trying to find parking when it’s late at night and you’re exhausted; finding the perfect spot only to get politely moved on by the local police; not being able to have the door open all day due to shitty weather and then feeling the claustrophobia creeping in. But all in all, the pro’s definitely outweigh any cons, and the things I complain about really aren’t bad at all in the grand scheme of things.

Our transformation - est march, 2019

6N9A4036.JPG
E1824D1F-0EE5-43AE-82EA-138384FD2D11.JPG
-7367722446082512807_265A4403.JPG
6N9A7227.JPG

A Weekend in Paradise: The Hamilton Princess Bermuda

 
6N9A9748.JPG

Having lived in New York for a good portion of my life, i’m embarrassed to admit I knew very little about Bermuda, the small tropical island just hop skip and a jump from NYC (besides of course the ever-so-infamous tale of the ‘Bermuda Triangle’). But after three days of exploring the island, I will be forever dreaming about this little 22-mile-long oasis.

Two weeks ago I jumped on a plane at JFK, and touched down just a little under two hours later in what i’d equate to be paradise. Vibrant blue water, coral reefs, cute marinas, and tropical plants scattered along the roads.. I honestly was so tongue tied and lost for words because no part of me realized Bermuda looked THAT good.

I met my driver outside the airport who thankfully didn’t judge me one bit for hopping in the front seat with him and pressing my face up against the window like a child. I’m sure he was used to that after living in Bermuda his whole life.

After a short but sweet drive around the island towards the city of Hamilton, we arrived at my hotel for the weekend: The Pink Palace. Otherwise known as the Hamilton Princess Hotel & Beach Club!

6N9A2607.JPG
6N9A2977.JPG

The Hotel

The Hamilton Princess & Beach Club is one of those places you see in travel magazines and think “holy cow, places like this actually exist?” I can vouch for that, because I was one of those people who, upon Googling the hotel, whispered those exact words to myself (while picking my jaw up off the ground). Bermuda is known for its pastel-colored buildings, and the Hamilton Princess is no exception, because it’s COMPLETELY PINK!

6N9A2990.JPG

Upon arriving at the Hamilton Princess, I was treated like a princess. The doorman (pictured above) literally sang to me and melted my heart. He even has a YouTube video if you want to get serenaded yourself.

ermuda_hamilton_princess_sunset.JPG

Wherever I am in the world, there’s nothing I love more than sparking up a conversation with the staff, and let me tell you something: the staff here were unlike any other. Their smiles were infectious, their willingness to help was unbelievable, and they were some seriously HILARIOUS humans.

After a breezy check in I dropped my bags in my gorgeous room (check out the epic view from the balcony in the photos below!) and headed out to explore the grounds.

The Hamilton Princess has no shortage of impressive decor, from famous artworks lining the hallways, to tropical plant pathways, to cute pink-walled photo op spots! It is far too easy to take beautiful photos there.

There are two pools, one adult-only if you want some quiet time, and the other being an infinity pool. I opted for the infinity pool each time though, mainly because it was one heck of a sunset spot. Need some convincing? I’ll just leave this here…

The food

If you want to enter food heaven, then you have to eat at Marcus, the Hamilton Princess’ on-site restaurant. With a menu featuring appetizers like fried chicken & waffles, lobster tacos, and fish chowder bites, it quickly became apparent that I should have brought my stretchy pants. I wanted to try EVERYTHING, and I think I pretty much did. I’ve never fallen in love with food harder than I did at Marcus. Tip: Make sure to try their famous signature drinks like the Rum Swizzle! It makes everything taste even better (if that’s even possible?) and is the perfect sunset drink.

ermuda_hamilton_princess4.JPG
ermuda_hamilton_princess3.JPG

The Beach Club

While we could have easily spent every waking moment at the Hamilton Princess pools, we also opted to catch their (very cute) pink and white bus over to the Hamilton Princess Beach Club. It pulls up to the hotel entrance every 45 mins, and the driver gives you a little bit of Bermuda history + some fun facts along the way to the beach. It’s only a 15 minute drive, but you get to pass beautiful sights like Warwick Bay and Horseshoe Beach along the way. Keep your camera handy!

6N9A2954.JPG
bermuda_beach_club.jpg
ermuda_hamilton_princess2.JPG

It was clear upon pulling up to the entrance that this was no ordinary beach club, because from the window seat of the bus I could spot a little sandy beach dotted with palms down below. The bay had the most turquoise water with ocean hammocks to chill in, and was the epitome of the perfect place to relax.

They also had free activities like paddle boarding, snorkeling, and kayaks, which made for an epic day of fun. My advice is to also check out the view from the rocks on the far side of the beach! There is a little pathway that opens up to a gorgeous blue-water viewpoint, and is great for some photo ops.

ermuda_hamilton_princess5.JPG
6N9A2938.JPG

While i’ve stayed in some beautiful places before in my lifetime, I can honestly say, hand on heart, that the Hamilton Princess takes the cake. The staff, the food, the room, the decor, the beach club - literally everything combined to make it the weekend of a lifetime, and I can’t wait to return someday!

And if you’re still not sold on visiting Bermuda, then take a quick look at some of my other photos from my adventures around the island.

6N9A2310.JPG
6N9A1758.JPG
6N9A0774.jpg

This is a sponsored post written by me on behalf of Fairmont Hamilton Princess & Beach Club. The opinions and text are all mine.


Dubai Travel Guide: A Modern Day Oasis


If I could sum up my week in Dubai using just one word to describe it, it would have to be “WOW”. From the moment I stepped off the plane at the Dubai Airport to the time we packed up to go home, that was the word that came out of my mouth most often (unless of course I was completely speechless).

Dubai is a city that, admittedly, I knew very little about before arriving, except for the knowledge of it being next-level futuristic. Much to my surprise, however, from day one I got to see so many different sides of the city that I never knew existed, beyond just the glitz and glamour. A lot of people have the preconception that Dubai is for the wealthy, but what you don’t realize is how accommodating it is to people of all backgrounds, budgets, and desires. If you want to live like a king or queen, you can. If you want to visit Dubai on a budget and not blow through your bank account, you can do that too. During my week in Dubai I got to experience many different sides of Dubai, and let me tell you first hand: I was blown away!

dubai_herodubai.JPG

To make your life easier when it comes to planning your own week in Dubai, I've listed my favourite things below!

Top things to do in Dubai

Desert Safari

If there’s one thing you have to do when visiting Dubai, it’s taking a trip out to the desert. We went on an evening safari with Arabian Adventures, and it’s hard to put into words just how exhilarating it actually was! Our hilarious driver, Abdul, took us on a 4WD ride of our lives over the sand dunes )which was an adventure in itself), and ended up at a bedouin camp in the middle of the desert for a night of festivities! We pet some gorgeous camels, got henna painted on, and had a barbecue of traditional food all while watching performances like belly-dancing and light dances.

dubai_desert.jpg
dubai_desert_safari.jpg
dubai_desert_henna.JPG

Burj Khalifa

Dubai is famously known for its biggest, tallest, and most extravagant architecture, and the Burj Khalifa is no exception. Standing at 829m tall, it’s the tallest building in the world, so it’s safe to say it’s something you MUST experience when visiting Dubai. Hint: splurge on the VIP pass to get you to level 148. You will bypass the lines and be able to escape the crowds on a totally different floor. You’ll then be able to get some incredible photos of the city below and they’ll even give you some snacks. Snacks always win me over.

dubai_burjkhalifaview.JPG
dubai_burjkhalifa.JPG

Old Dubai

We spent our first day in Dubai exploring the sights of the old town, and it was easily one of my favourite days. Our wonderful Arabian Adventures guide Rhiannon first brought us to the Al Fahidi Historical Neighborhood, which felt like we were transported back in time. In this neighborhood you can walk around the alleyways to see the traditional style buildings, and even take a look inside them which have been transformed into cute little boutique shops. I also would recommend crossing the Dubai Creek to see the spice and gold souks. The markets are bustling with activity and the energy there is unmatched. I was amazed by the endless spices, perfumes, tea, fabrics and jewelry that we walked by, and my only regret was not bringing a second bag to stuff full with souvenirs!

dubai_alfahidi.JPG
dubai_al_fahidi.JPG
dubai_souks.JPG

Hero Dubai

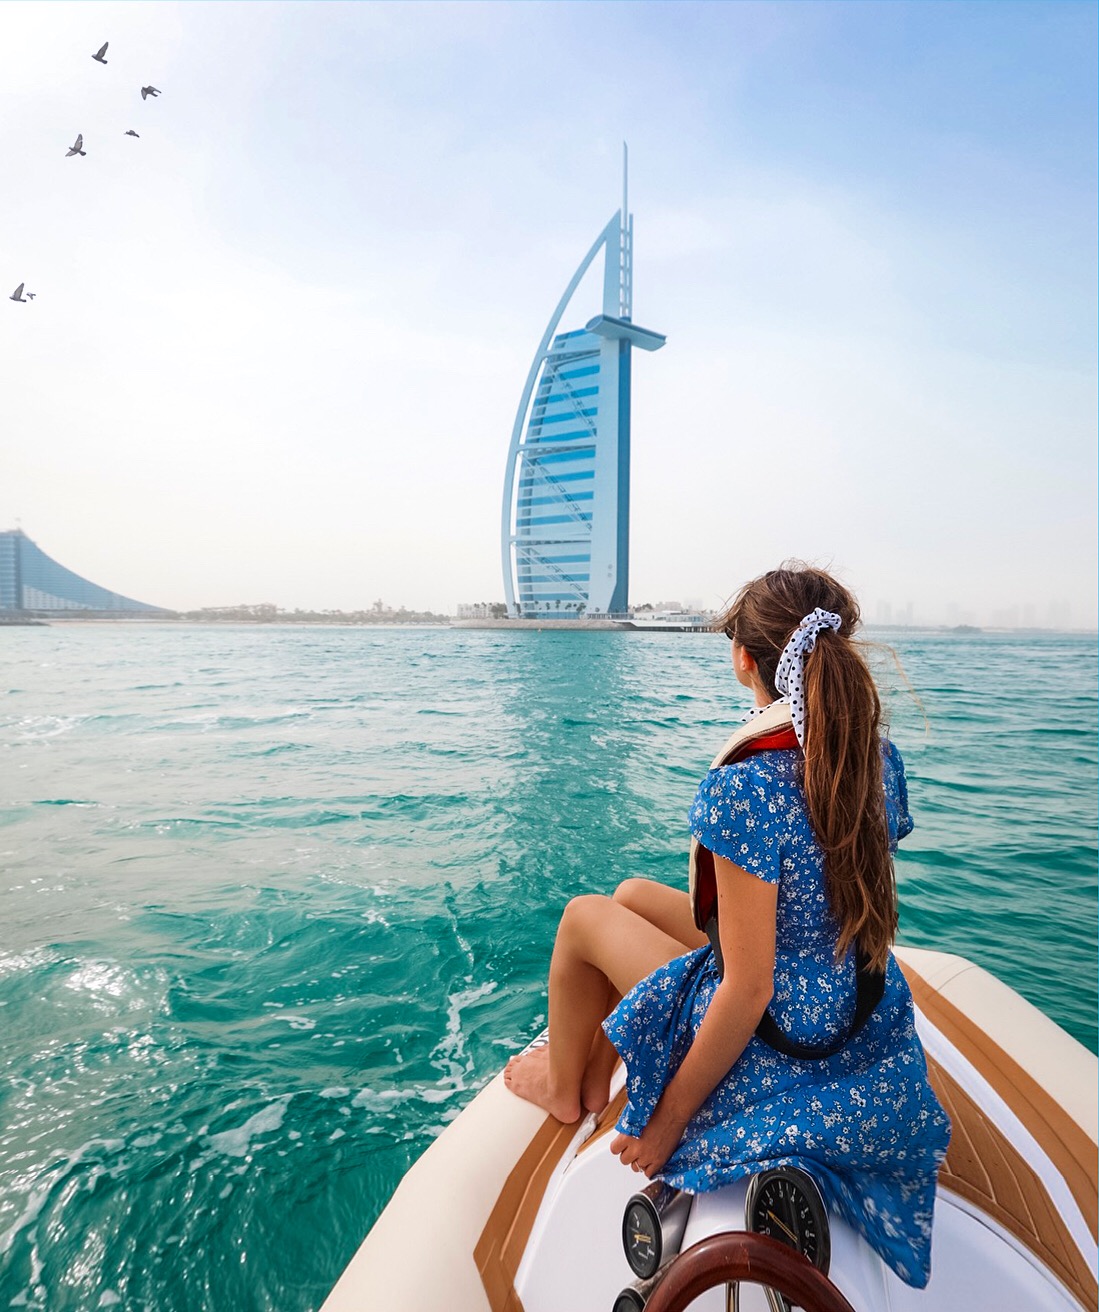
Hero Dubai was another thing that hugely surprised me. Dom and I got to be the captains of our own boat for the day as we set out along the coast to see the city from a totally new perspective - the water. We had an awesome guide with us the entire morning who took us past sights like the Burj Al Arab, the palm, and all the way out to Atlantis. Pro tip: Don’t forget the GoPro! You’ll be sure to get some crazy shots while you’re whipping around the waves.

dubai_heroboat.jpg

La Mer

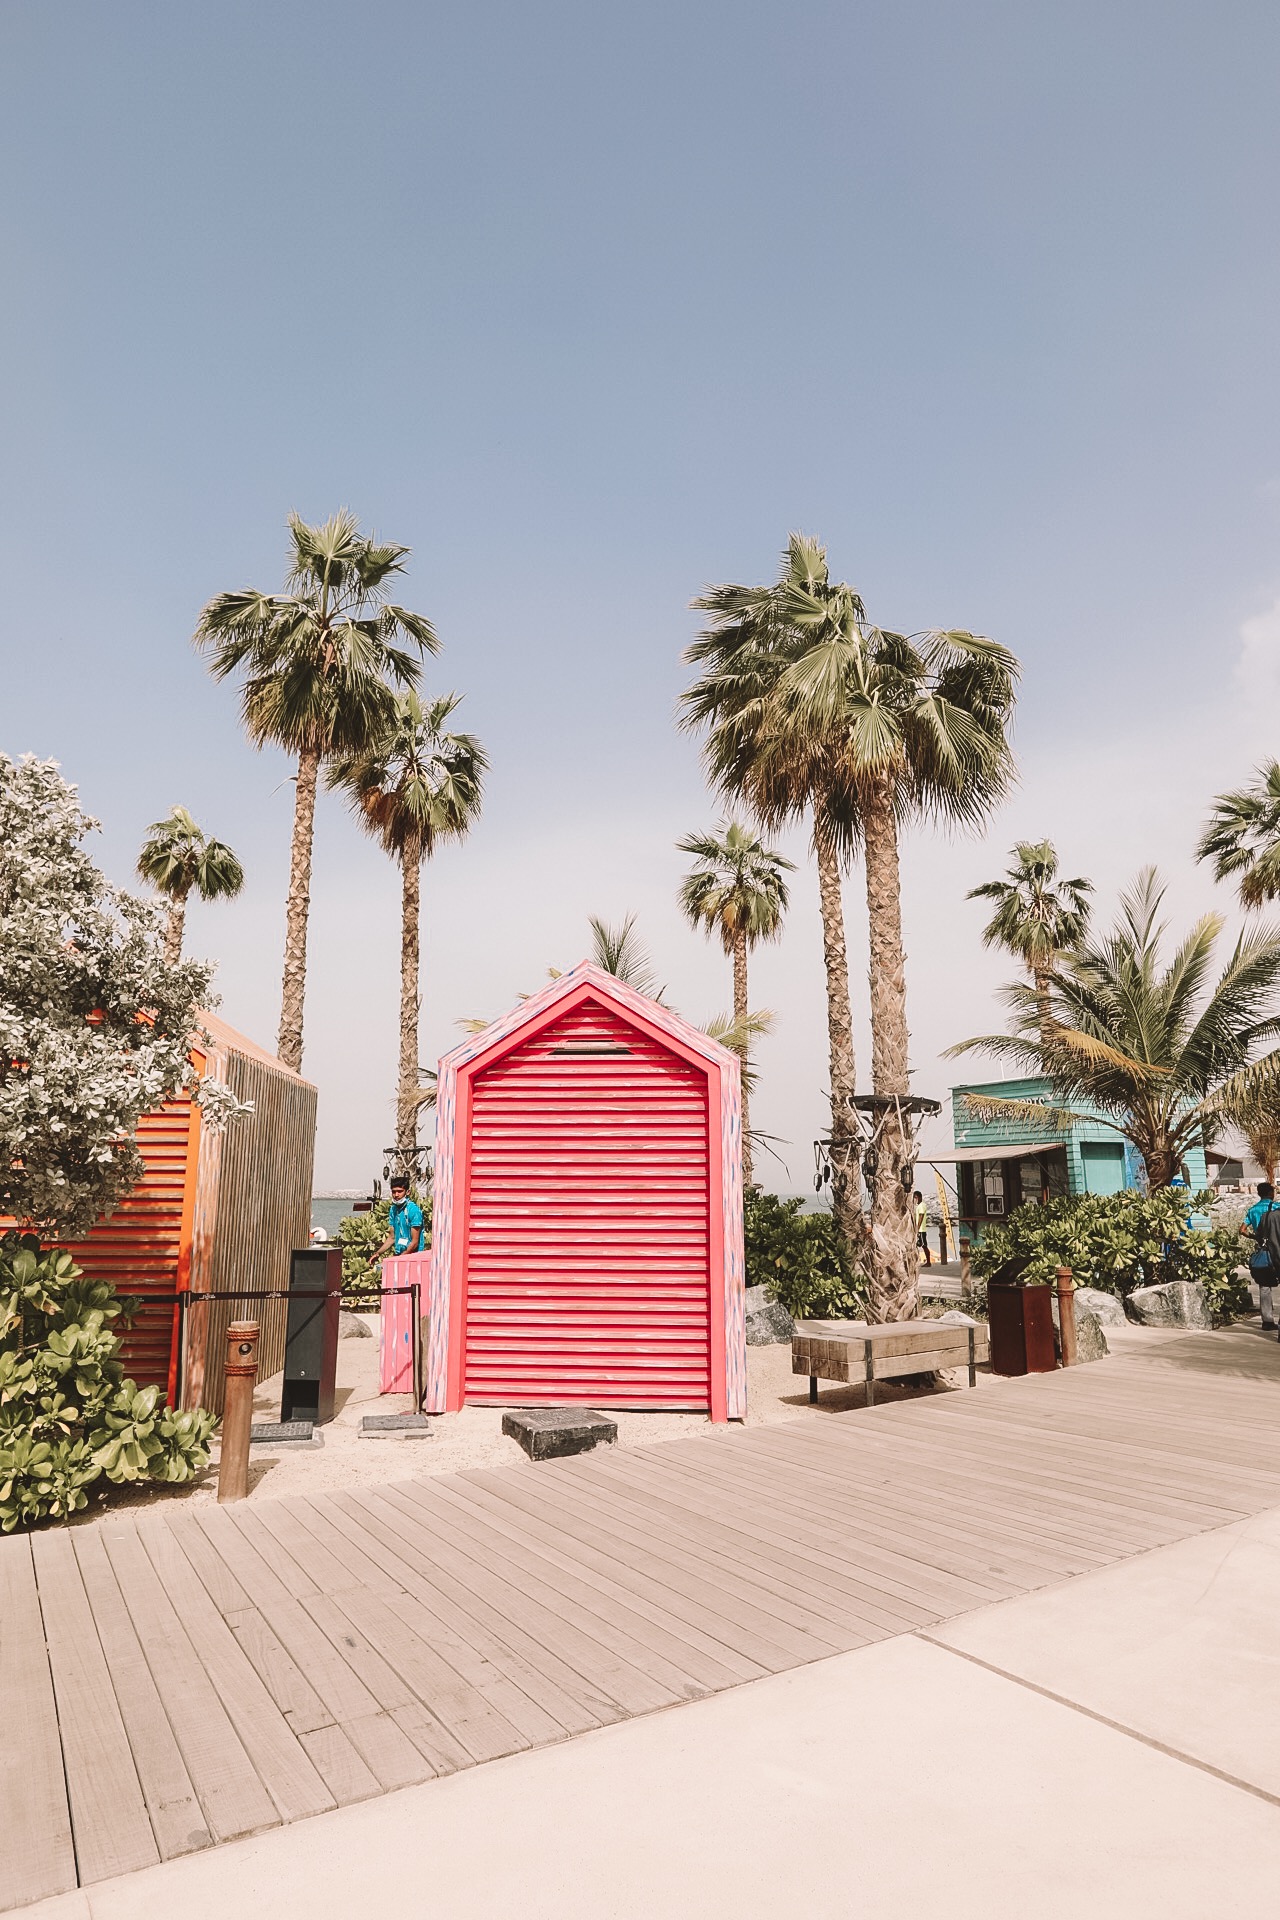
Dubai has it all - a crazy futuristic city, desert as far as the eye can see, and much to my surprise, it even has an amazing beachfront area. I don’t know about you, but when I picture Dubai, I never envisioned powdery sand, colourful beach huts, and a trendy boardwalk, but low and behold, La Mer has just that. We spent the morning wandering among the boutique shops, snapping photos of all the colourful wall murals, and watching the waves roll in. A little tip: they do not allow professional cameras there unless you get permission, so i’d recommend leaving the DSLR’s behind and opting for some good old iPhone shots!

dubai_lamer.JPG

Dubai Frame

One of the experiences that knocked my (metaphorical) socks off was paying a visit to the Dubai Frame. This place only opened in January 2018, but after taking a ride to the top it’s pretty clear why it’s so popular. Upon entering the frame, you walk through a representation of old Dubai and then travel up in the glass-window elevator to the very top which represents present-day Dubai. When looking to the right you will see Old Dubai, and to the left you can see the city which represents new Dubai. It’s pretty darn neat, and what makes it even more amazing (if that’s even possible), is the fact that a section of the floor is completely glass! For someone who’s afraid of heights like me it can be a tad bit scary, but such an exhilarating thing to experience at the same time. After gawking at the views, you travel back down the frame and experience “future Dubai”, which I don’t want to spoil for you, but let me just say, Dubai truly has some amazing things planned and I personally can’t wait to see where it is in 10 years.

dubai_frame.JPG
dubai_frame_.JPG

Visit the Palm Islands & Atlantis

You can’t visit Dubai without venturing out to the Palm Islands. I remember learning about the Palm in 6th grade and being absolutely mesmerized over it. Like, how cool is it that someone thought, “let’s make a few islands and shape them to look like a palm tree.” That person is an absolute legend. Anyways, back to the guide. One one of the sandier days (because it’s not the rain that keeps you indoors in Dubai - it’s the sand), we headed out to visit the Lost Chambers Aquarium at Atlantis, and boy was that a day for the books. The aquarium is beyond fascinating with its giant glass panes, and we spent a good hour (or three) just mesmerized by the manta rays, fish, and sharks that swam by. Definitely a must-visit spot!

dubai_aquarium_atlantis.JPG
dubai_palm.JPG

Dubai Mall

“I’m not like a regular mall. I’m a cool mall.” should be Dubai’s motto. It puts all other malls to shame, because this place has everything you could ever want. Budget fashion, check. Luxury fashion, check. Aquarium, check. Ice rink, check. Restaurants, check. Awesome view, check check check! We visited in the afternoon and made it just in time to see one of the fountain shows, which I can’t recommend more highly when in downtown Dubai. The evening shows are also pretty fab and run every half-hour starting from 6pm and ending at 11pm.

Dubai Miracle Garden

This gorgeous attraction has over 50 million flowers and 250 million plants, so it’s every nature-lovers dream. I’ll let the photos do the talking for me, but in all honesty, they can’t even do it justice because the Dubai Miracle Garden is seriously phenomenal.

dubai_miraclegarden.JPG

La Perle

Ok ok so I know I've already given you quite a few must-do’s for your trip to Dubai, but please do me a favour and put La Perle at the top of your list. I kid you not, this was THE most spectacular show i’ve ever seen. I don’t want to give you too many spoilers, but it included incredible aerial acrobatics (and some insane dives), a pool in the middle of the stage, FIVE motorcycles riding around a tiny globe, and will have your jaw on the floor for 99.9% of the show.

dubai_laperle.JPG

Palace Downtown

If you want epic photos combined with the best lunch, then the Palace Downtown needs to be on your Dubai bucket list. If the entrance itself doesn’t impress you, then wait til you see the view from their Argentinian restaurant, Asado. It has the best view of the Burj Khalifa and their outdoor restaurant gives you a perfect view of the fountain show.

palace.jpg
dubai_palace_downtown.JPG
palace_downtown.JPG

Where we stayed?

Palazzo Versace

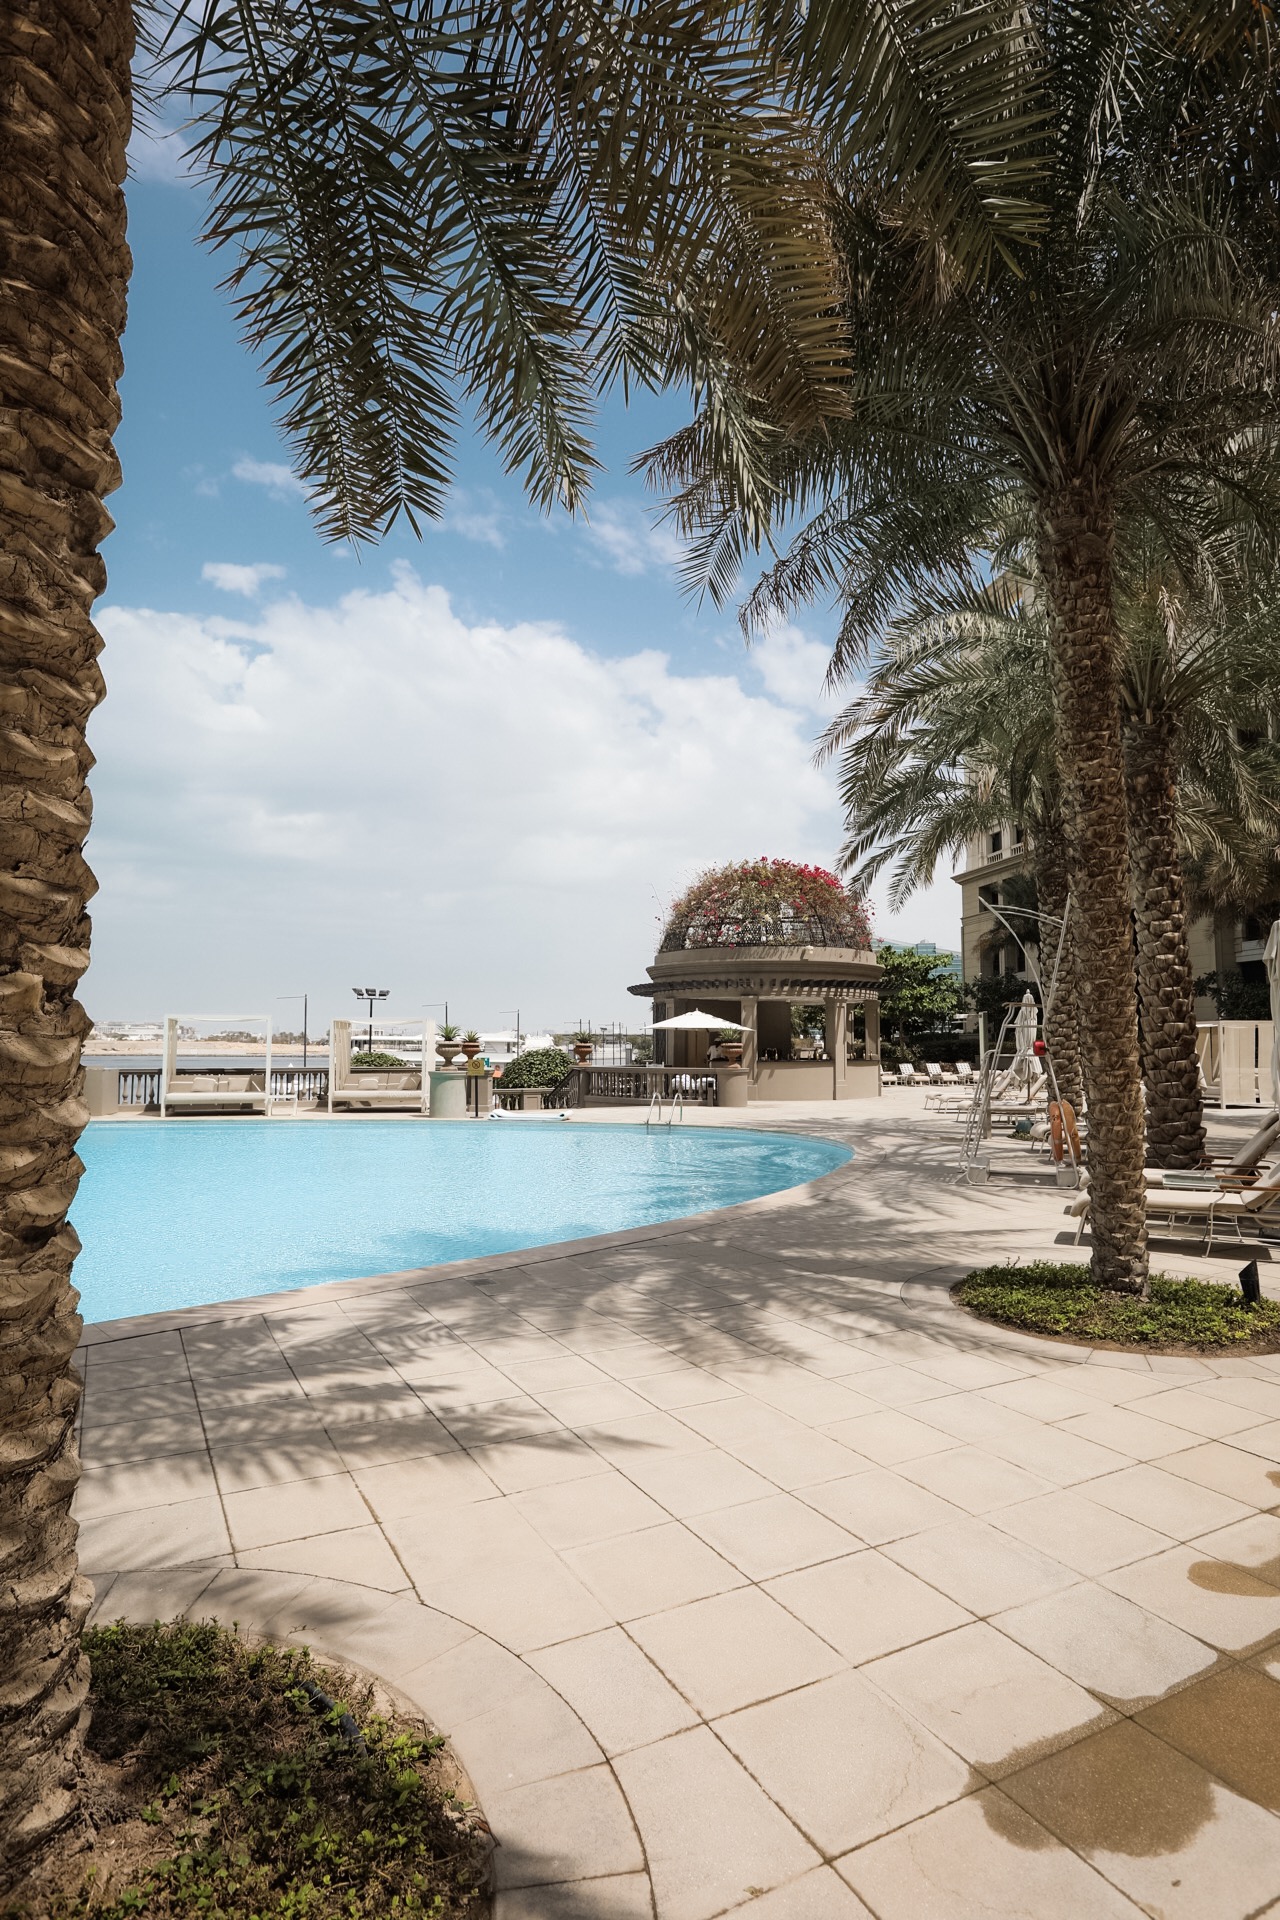
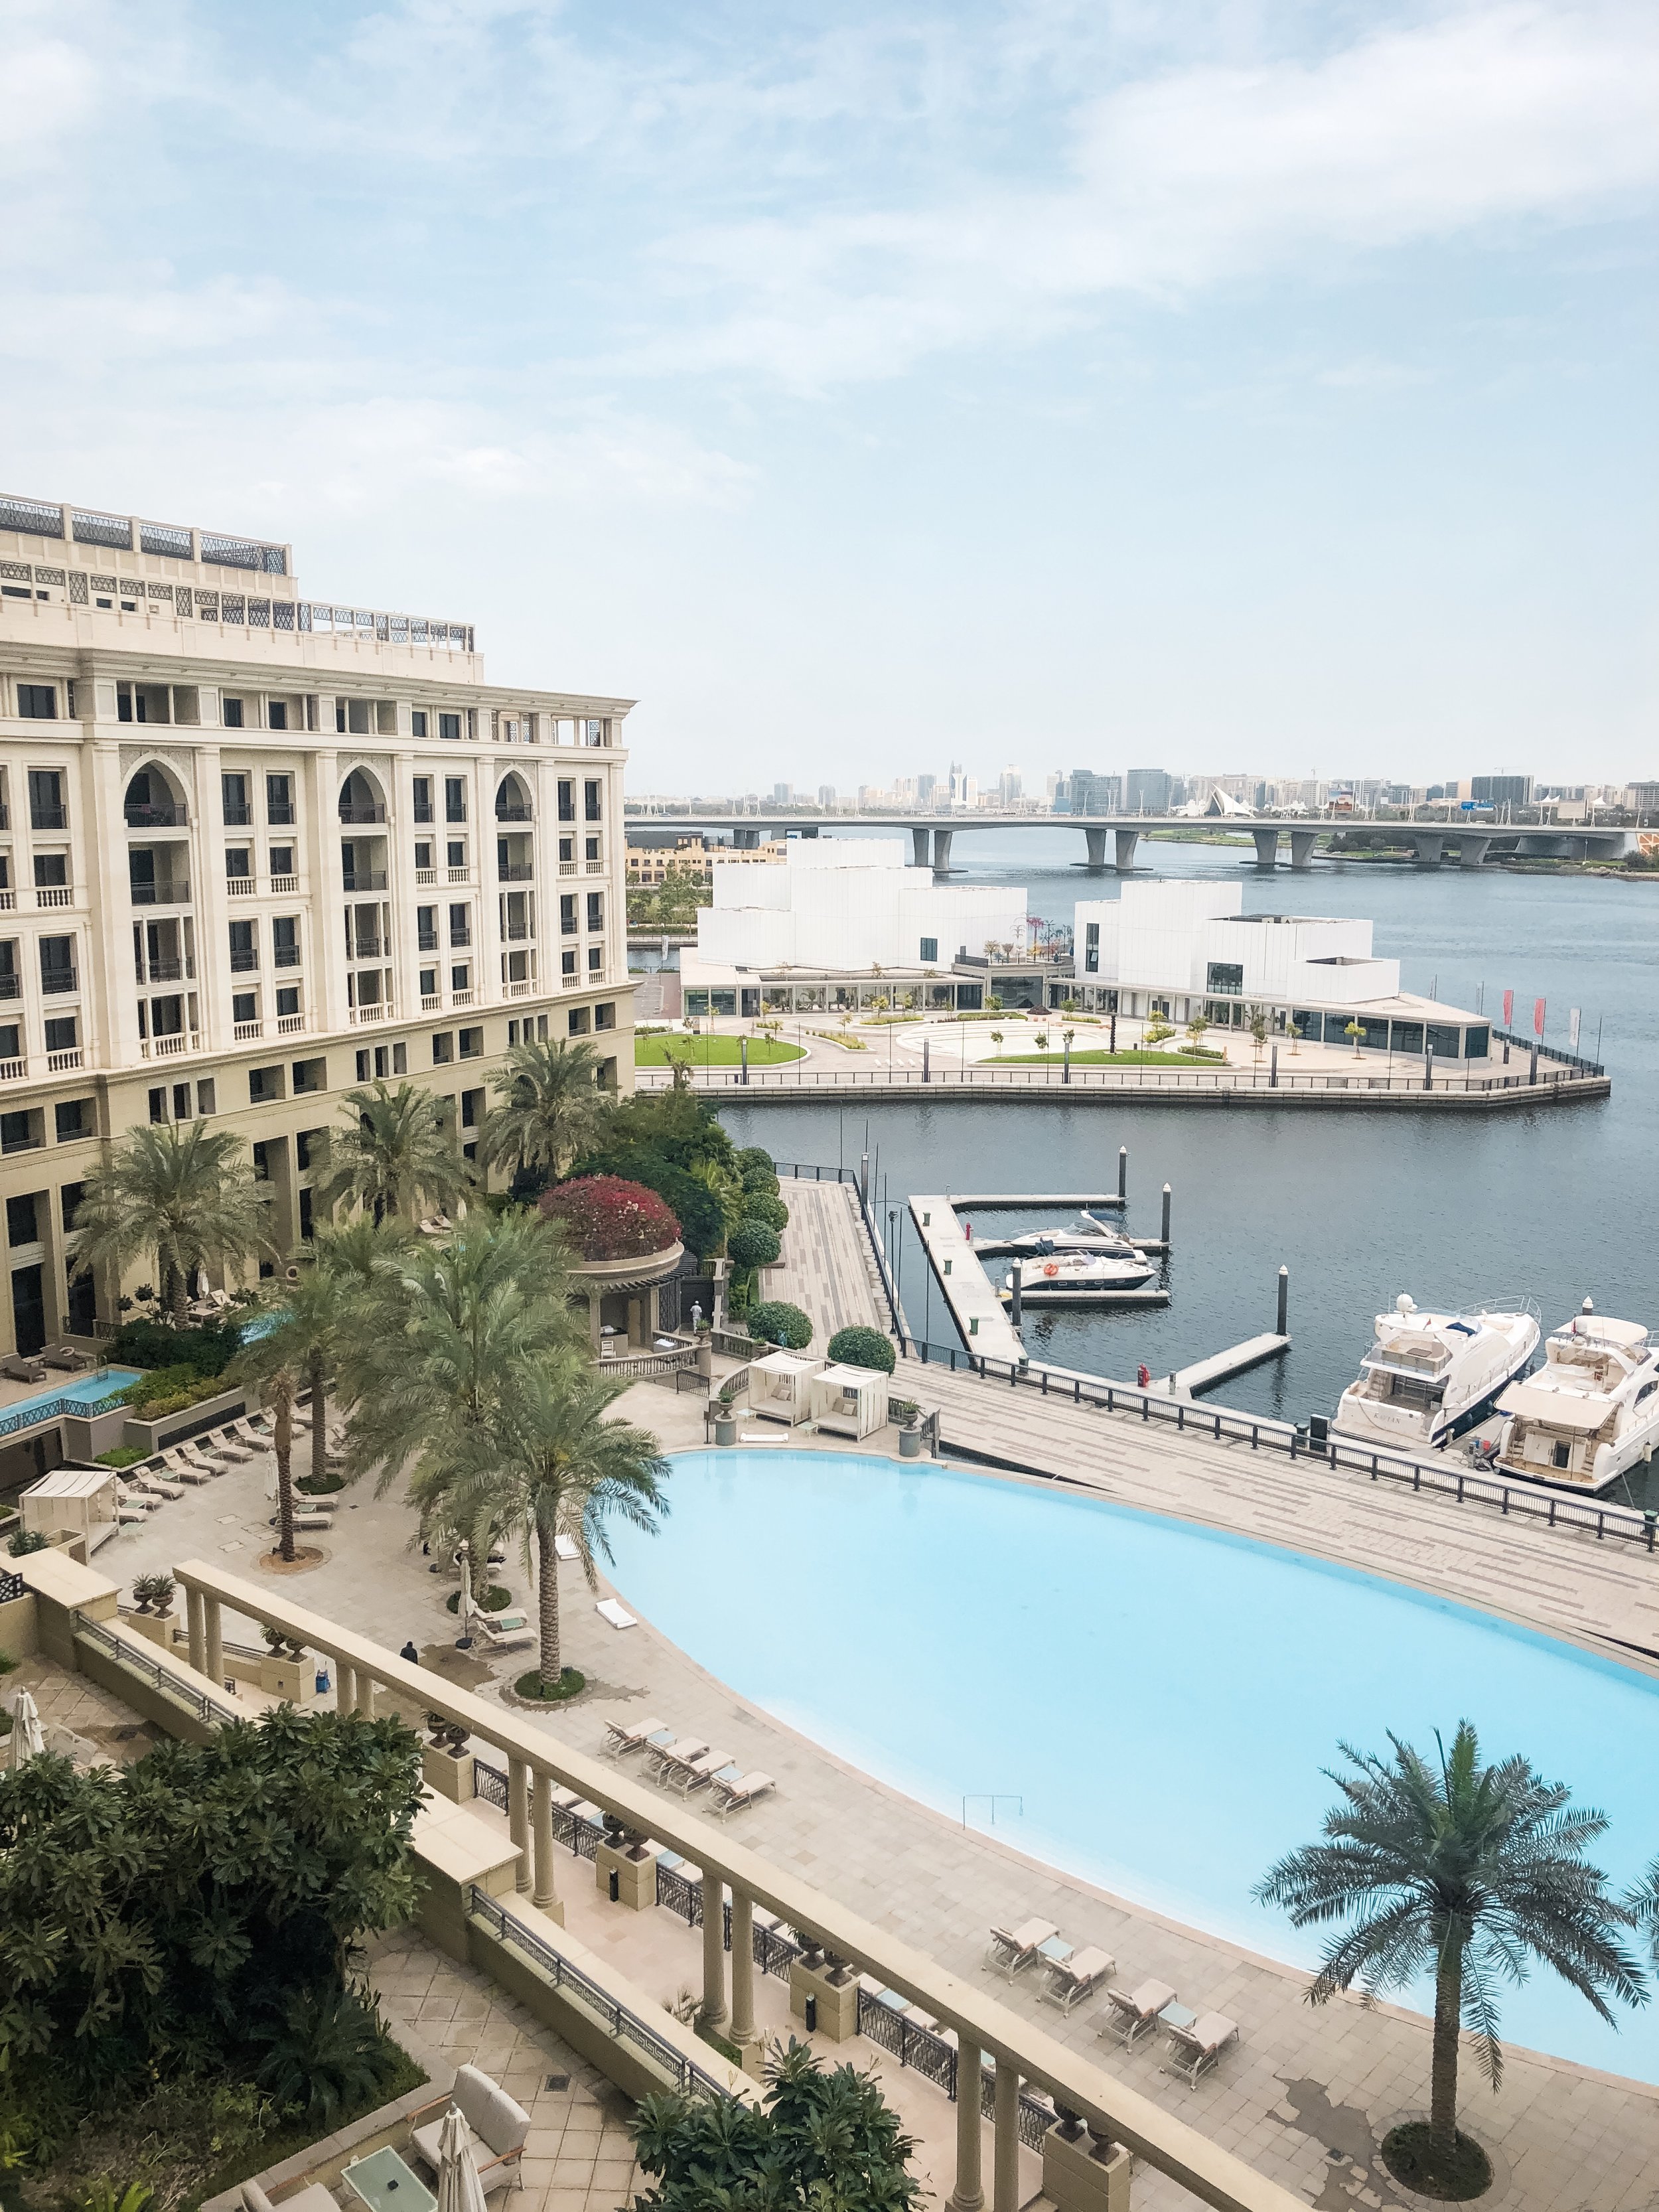
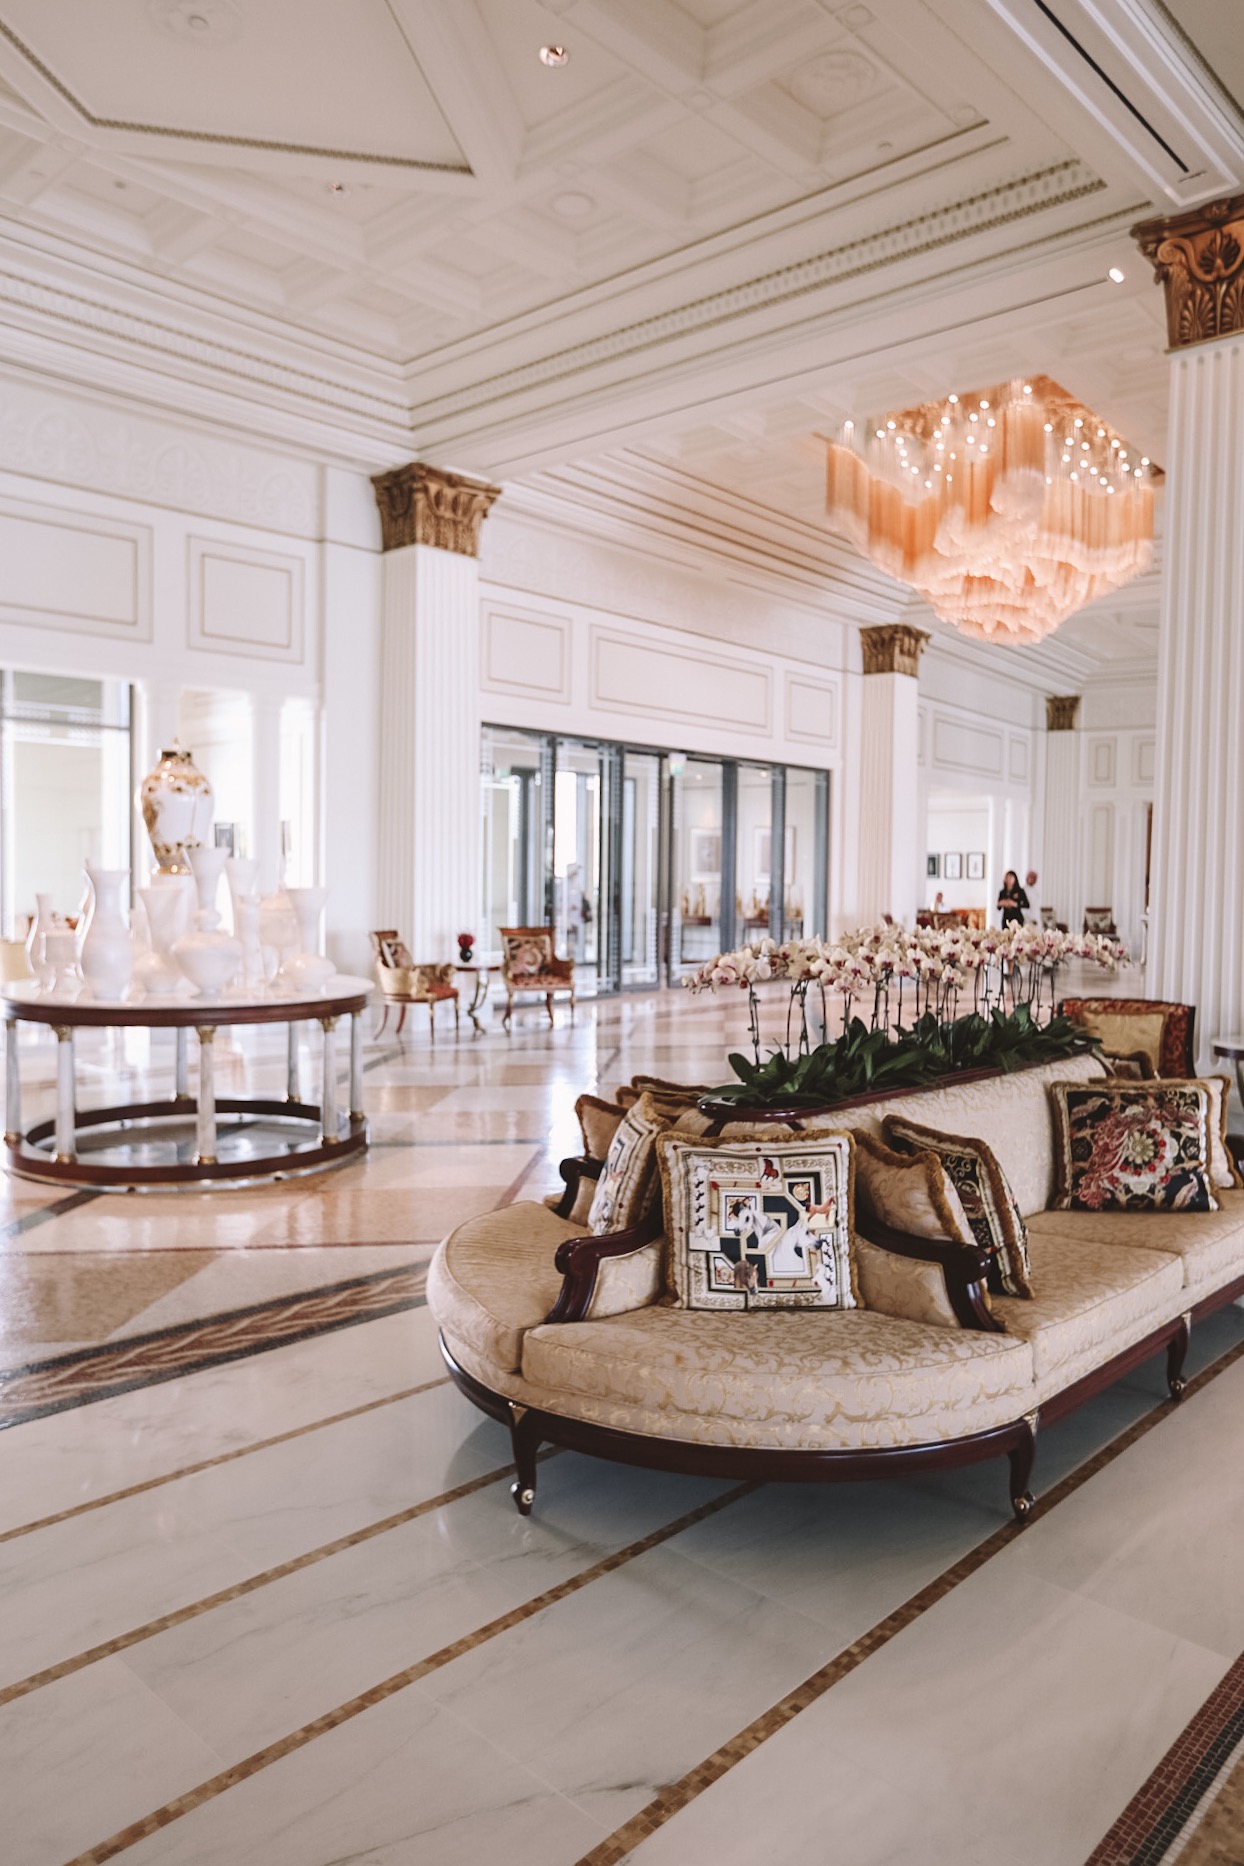
For our 6 nights in Dubai we stayed at the Palazzo Versace, a beautiful five-star hotel located near the DXB airport, that was hands down the most luxurious place i’ve ever stayed. I literally felt like Princess Jasmine the entire length of our stay, as it was such a contrast from everything i’m used to when it comes to accommodation. Fine dining, magnificent rooms, butlers, and high tea are just a few of the perks we got to enjoy during our stay, and it truly was the most memorable hotel.

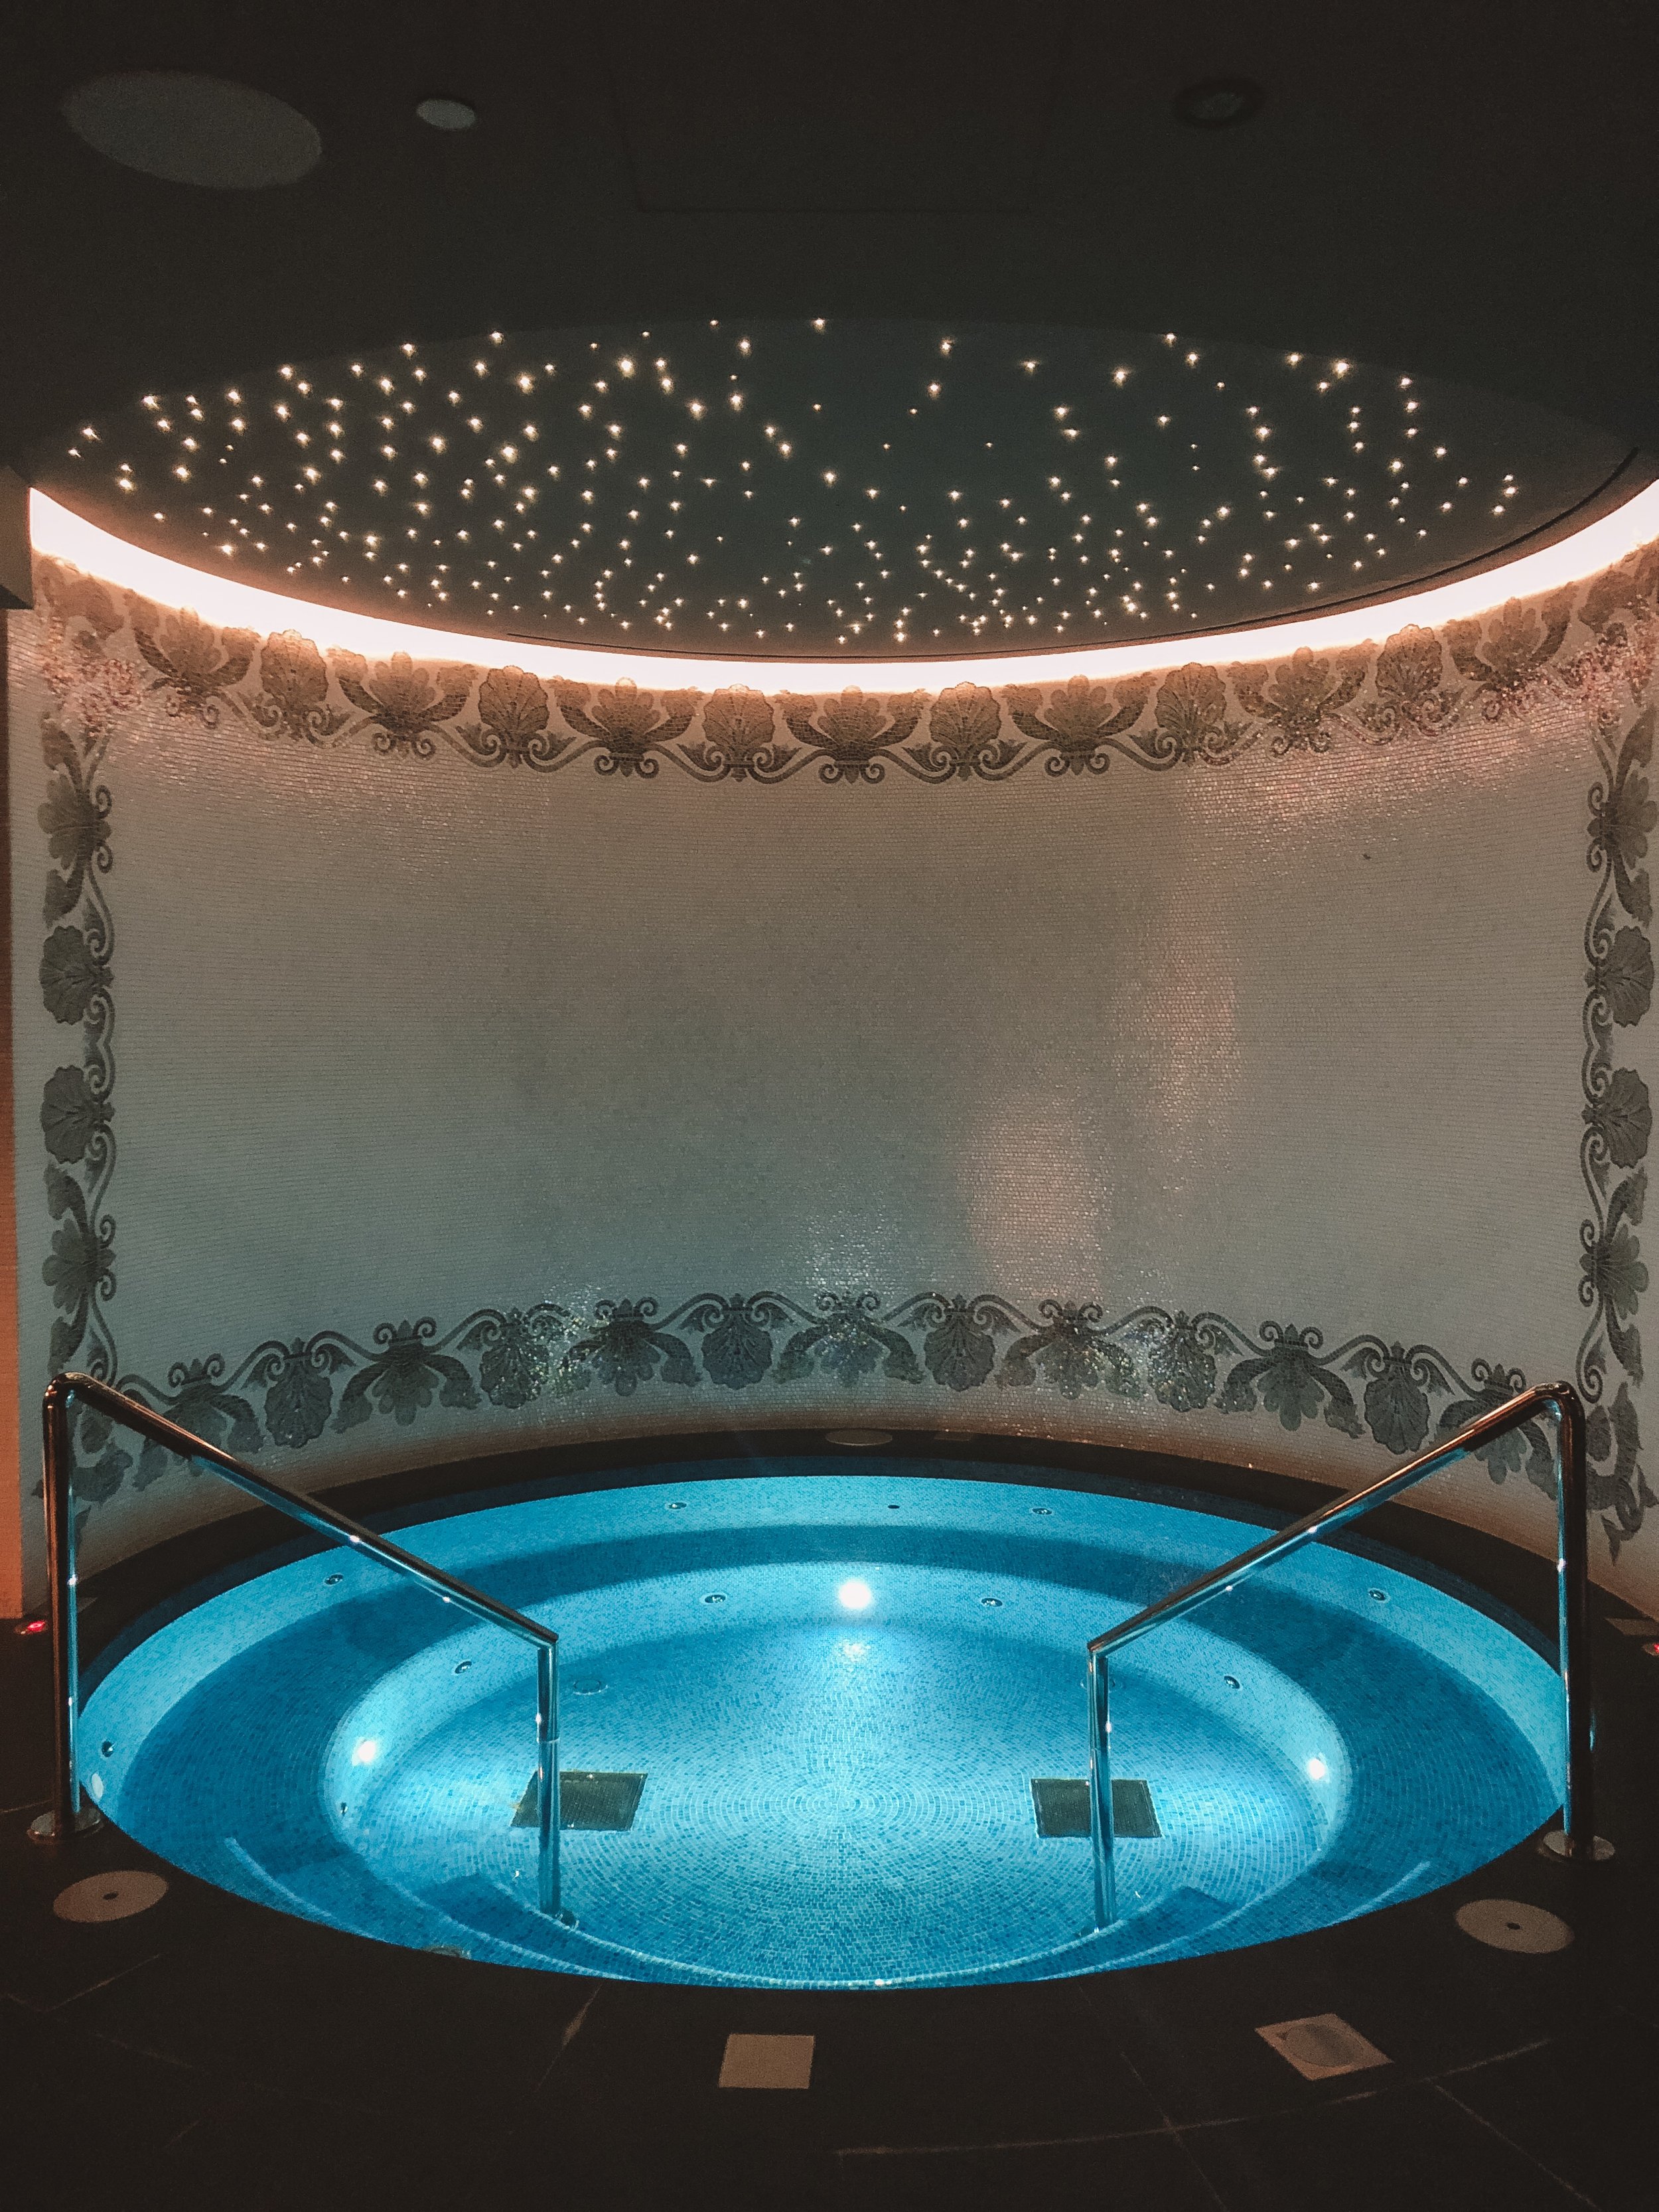
The Palazzo has three gorgeous pools, the most impressive and truly grand interior, and is surrounded by palm trees which made it feel like an oasis! Not to mention it has both city views and a Dubai Creek view which makes for some epic sunrises and sunsets. Now I know a lot of you are budget travelers (like I am 99% of the time), but if you want to give yourself a luxurious Dubai experience, the Palazzo Versace is definitely the place to stay. You’ll be treated like royalty, and the staff are some of the friendliest people i’ve ever encountered. Shoutout to Ken and the valet guys for giving us a good belly-laugh on the daily!

We also ate at 3 of Palazzo Versace’s unbelievable restaurants:

  • Enigma: For my first time eating at an Iranian restaurant, I was floored by both the menu and service. With a romantic atmosphere, it was the perfect date-night spot, and the chef even came out at the end of our meal to prepare traditional ice cream in front of us.

  • Vanitas: An Italian restaurant with amazing ambiance and an even more amazing menu. This was one of our favourite places to dine, as the food was exceptional and we enjoyed the best Italian food we’ve ever had. To top it all off we ended each meal with some drool-worthy desserts, and we almost had to be rolled out of there!

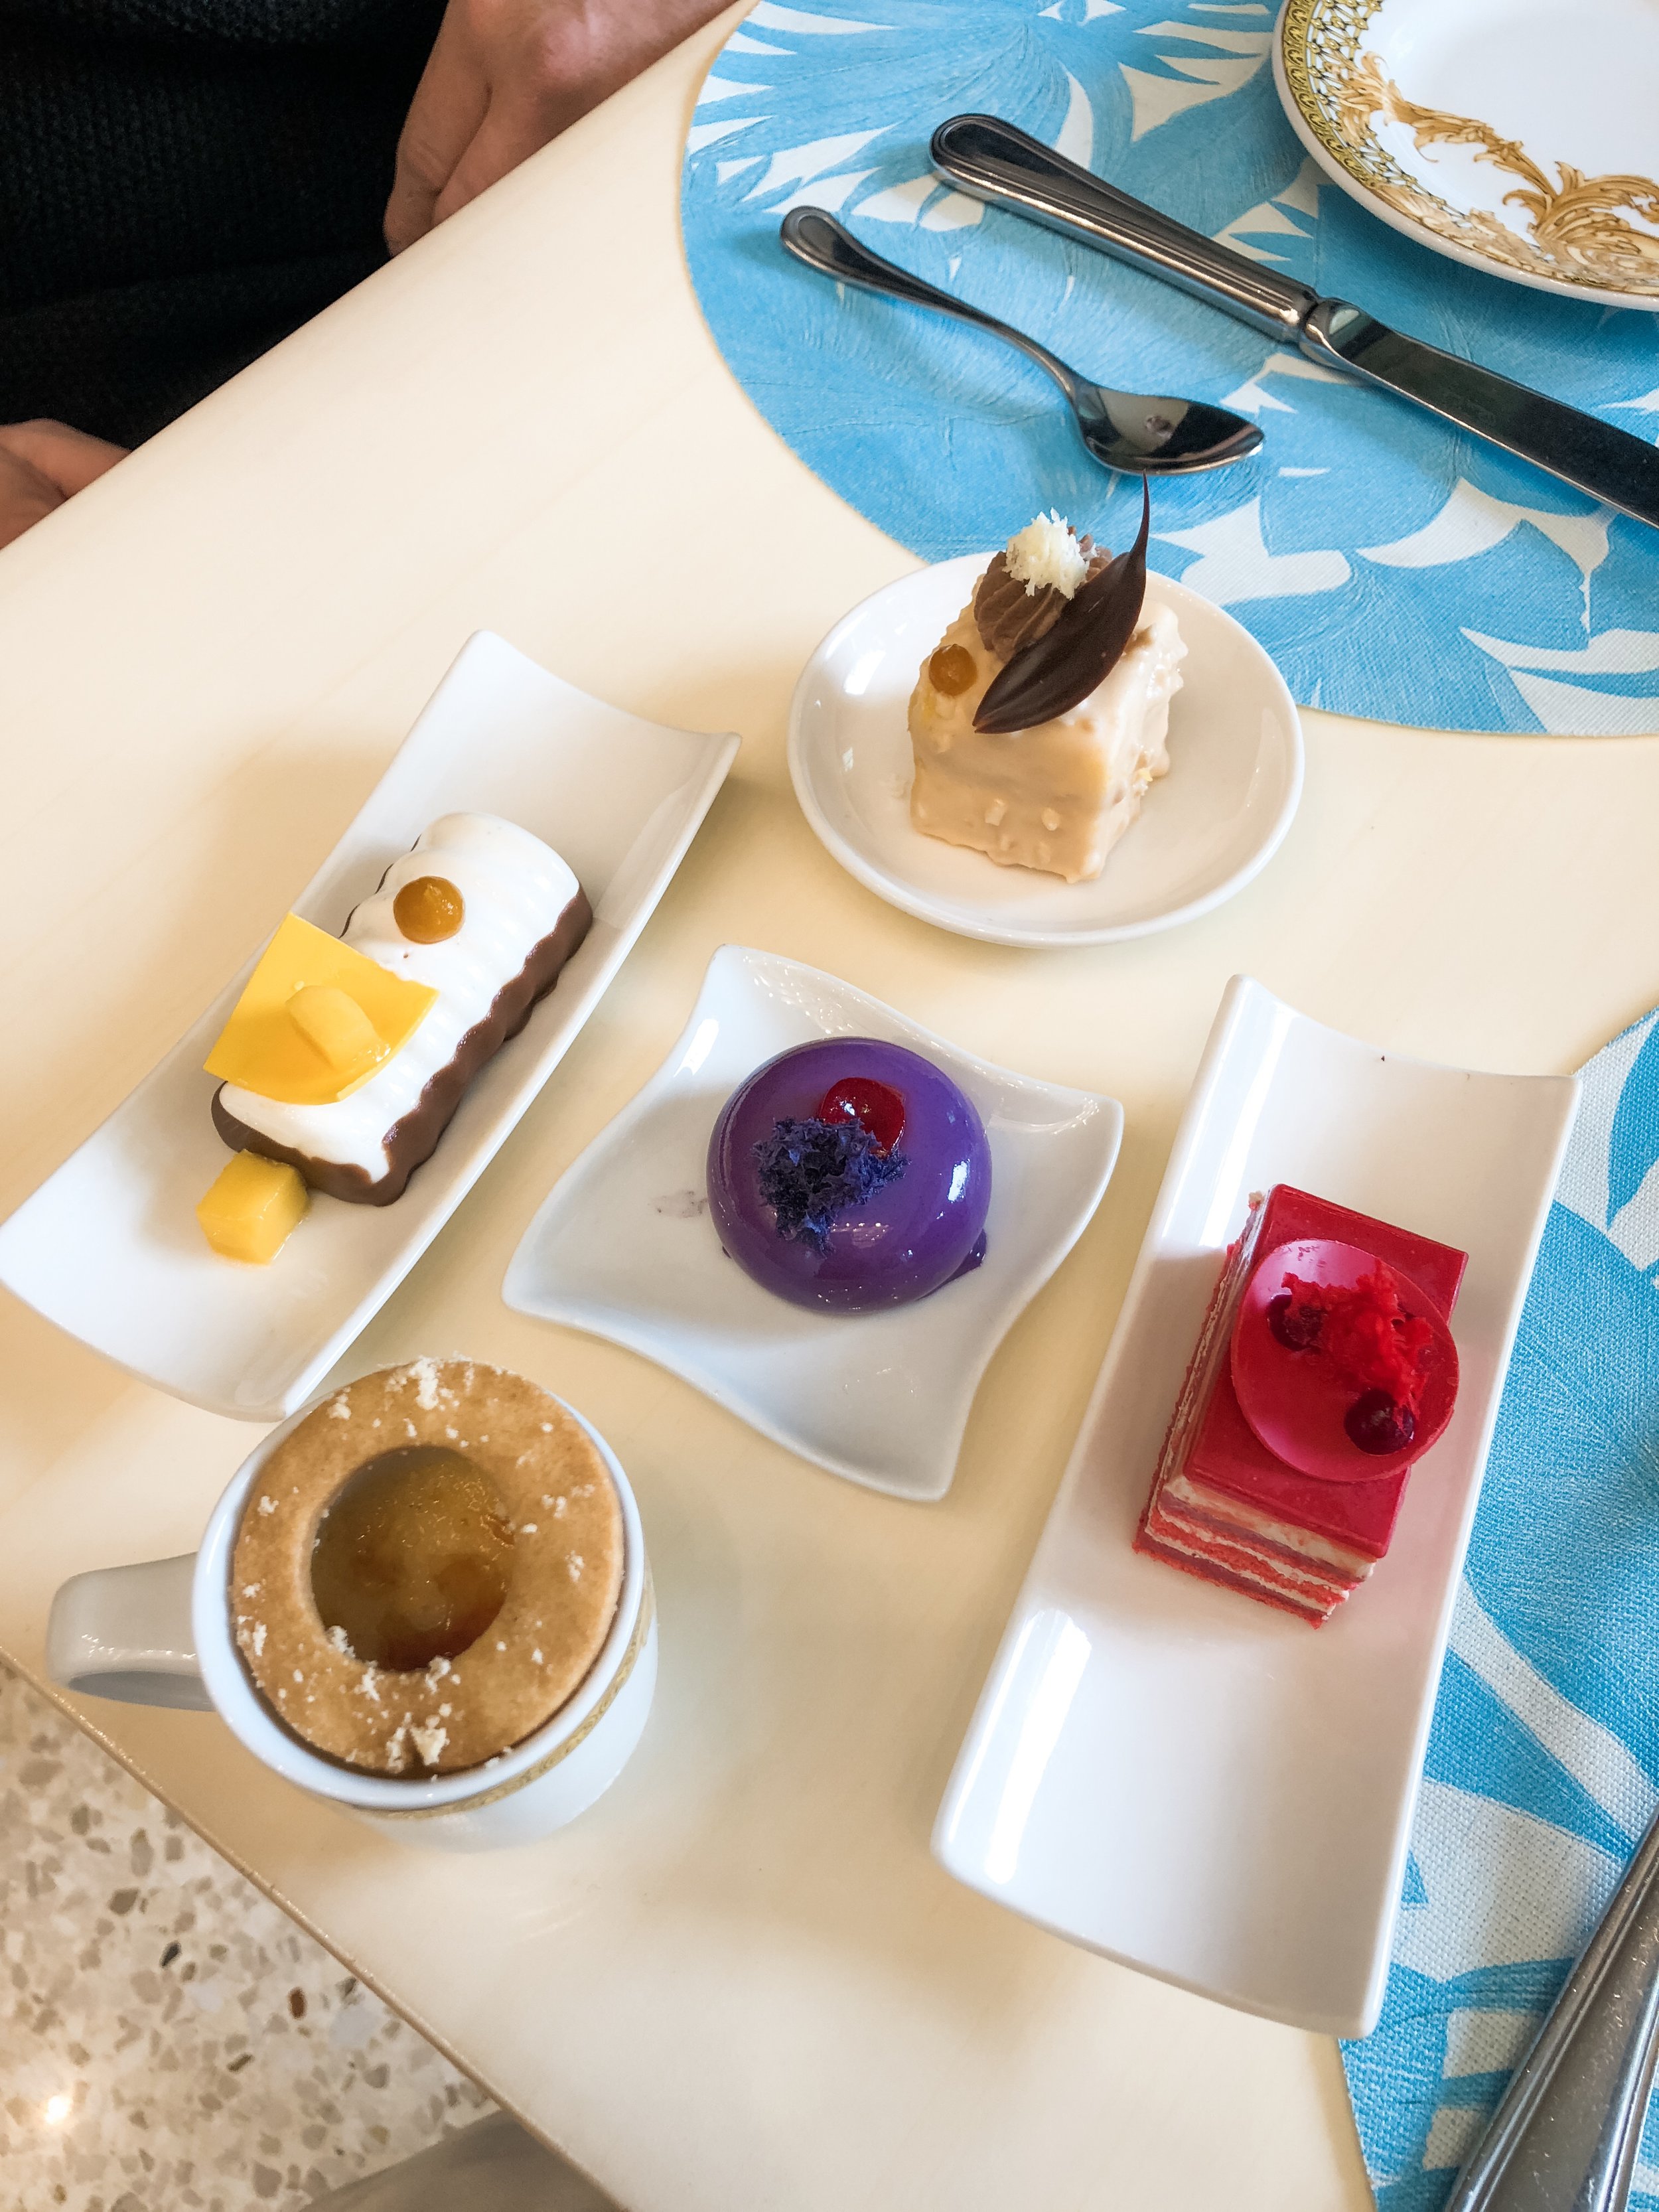
  • Giardino: The best brunch buffet of my life. Giardino was what I like to envision heaven to be - endless choices of desserts and every type of food you can possibly desire. They even have a donut bar, so yeah, it’s safe to say their brunch trumps all other brunch spots.

And without further ado, I have saved my personal favourite dining option for last, because on our final night in Dubai, we went to food heaven at a place called Umi Shio at Summersalt Beach Club. If the prime view of the Burj Al Arab isn’t enough to convince you that this place is worth a visit, then let me tell you about the food. This Japanese-Argentinian restaurant truly has some of the best food i’ve ever tasted. I’m not exaggerating one bit either.

Now, i’ll be the first to admit i’m a little picky when it comes to food, so when our waiter suggested having us try a tasting of the menu, I was a bit hesitant. But I kid you not, EVERY. SINGLE. DISH just got better and better. Do your taste buds a favour and visit this restaurant, and then send me pics of your food so I can live vicariously through you.


48 hours in New York City

For anyone who has seen Home Alone 2, Elf, or pretty much any epic Christmas movie, New York City is often in the spotlight as the ultimate winter destination. When it came to bringing Dom home with me for his first white Christmas, I was determined to make it unlike any other holiday he has experienced before, so that meant two things: a quick pitstop in NYC, and all the winter activities we could fit into 48 hours. Our last experience in New York City was memorable in a not-so-great way (we spoke to the police 3 times in 3 days due to a stolen camera, an unprovoked fight with a homeless man, and a history of watching too much CSI caused us to think we found a dead body, but that’s a whoooole other story for another day).

But if you’ve got a brief stopover in the Big Apple, read on to see what we got up to in the almost two days we spent in magical New York City.

Where we Stayed

HI New York

IMG_1941.JPG

New York City at Christmas time is magical, sparkly, snowy, and EXPENSIVE. When I planned the end of my Southeast Asia trip with 2 nights in New York City to be the bow on top of a great year, I didn’t take into account the fact that hotels and Airbnb’s are soul-crushingly expensive. $400 for two nights in Manhattan is frankly just not going to happen, so I looked to my favorite go-to accommodation option, Hosteling International. HI New York | HIUSA is located on the Upper West Side just a few short blocks from Central Park, so it was pretty much a no-brainer. A warm shower, super comfy bed, high-speed wifi AND a place to meet new people with a ton of cool travel stories: count me in!

HI New York is a beautifully unique building on the corner of Amsterdam and 103rd St, and it was the perfect spot to not only recover from our jet lag, but base our New York City adventures from. The check-in process was easy, and once we dropped our bags off in our room and fan-girled over the fact they had hot showers (one thing Southeast Asia hostels lack in!), we decided to explore the surrounding area.

Just steps from the hostel was a Dunkin’ Donuts, a true savior when it comes to getting your cheap coffee fix in the Big Apple, around the corner was both McDonalds and a cheap pizza joint, and one block away was a subway station to get us to all the city hotspots. Convenience level: 100.

New York City can be daunting when it comes to knowing what to do, so my personal favorite way to get to know a city is through walking tours. So if you’re anything like me, you need to take advantage of HI New York’s free programs and activities! Learning the history from a local is great, but it’s the social aspect that I love the most, and that’s what HI New York does exceptionally well: bring people together.

One of my favorite moments of our stay in NYC was honestly the welcome party thrown by our hostel. The common area was full of people chatting and laughing, and we met so many amazing people there with incredible stories. The conversation was flowing and so was the free wine, so that combination made for one happy Jess!

What we Did

There were some very specific things on my personal Christmas Bucket List when it came to our trip to the city. In the wise words of Buddy the Elf, “First we’ll make snow angels for two hours, then we’ll go ice skating, then we’ll eat a whole roll of Tollhouse Cookie-dough as fast as we can, and then we’ll snuggle.” Throw in a stop to Times Square and Rockefeller Center, and that pretty much sums up my dream trip to New York.

Times Square

IMG_1954.JPG

Our first day was off to a challenging start as we took 3 wrong subways all thanks to my expert navigation skills and a lack of wanting to ask for directions, but once we had safely checked into our hostel and set out to explore, we realized we made one massive faux pas: we had absolutely NO proper winter clothes! But according to my younger brother who came into the city to see us, the best shopping was where we were headed anyways! And no I don’t mean the best shopping as in Saks Fifth Ave and designer stores - I wasn’t about to blow my whole monthly SE Asia budget on one coat. So my type of shopping is those in Times Square where I can find a winter coat for $25 (Forever 21, FTW).

After me and Dom had picked ourselves out some warm new winter outfits, we gawked at all the Times Square lights for a while, snapped some typical tourist photos, and set our sights on our next activity: FOOD. Big shoutout to Chick-Fil-A for the best customer service in the fast food game. That was just about all we could manage to do on our first night before the jet lag hit, so let’s fast forward to our first morning in the city!

IMG_2147.JPG

central park

We only had one full day to explore the city, so Central Park was an absolute must on my bucket list. We took a quick morning walk just a couple blocks from our hostel, and found our way to the entrance to Central Park. Obviously I was on lookout for the Park Rangers the whole time (are the Elf jokes getting old yet? HA), but we ended up at the Lake Viewing Area, a beautiful frozen lake overlooking the city buildings. I couldn't resist having an impromptu photoshoot when the snow started falling, so I was literally giddy with excitement. My brother Nick did a killer job with the photos, and it was just a pretty darn picture-perfect winter moment.

We wandered through Central Park past horse-drawn carriages and people walking their dogs, and made our way over to the ice rink. If you’re in NYC during the winter time, ice skating is definitely something not to miss. Even if you’re not much of an ice skater, it’s still a fun activity to watch the other skaters wibble and wobble over the ice and try their darnedest to stay on their feet. It could also be made into a fun drinking game, now that I think about it: Drink every time someone falls. Patent pending.

ROCKEFELLER CENTER

Next up on the bucket list was Rockefeller Center, which is basically the epitome of magical Christmas activities. You have ice skating, you have twinkly lights, and you have the most extra Christmas tree you’ll ever see in your life. This 72-foot tree towers above the ice-skating rink and puts your own Christmas tree back home to shame. There’s no competing with New York City.

We spent the good part of an hour just people watching while everyone skated to the tune of Christmas carols, and then headed over to see a new insta-famous sight, and somewhere equally as exciting due to its appearance in Gossip Girl, Lotte Palace. Filling the already impressive courtyard is a gorgeous cone-shaped tree, and photos do it better justice than any words I can write, so take a look below! It was the best way to wrap up an amazing day, and we headed back to HI New York for our last sleep before heading home for the holidays.

What we Ate

pizza, duh

Dom’s only request for our trip to New York was pretty simple: Pizza. The way to his heart is easy, and there’s something truly special about $1 pizza slices the size of your head, especially when found in a city where food is generally expensive. But my brother Nick wasn’t about to settle for any old pizza joint. He wanted the best of the best, so where did he take us? The World Famous Little Italy Pizza, located between 5th and Madison.

I was skeptical, because after all, anyone can claim to be “World Famous” these days, but this place honestly deserved that title. We paid a much higher price of $5 per slice, but still worth it once you taste it. Other than fulfilling Dom’s pizza wish, our diet consisted of whatever was cheapest: Chick-Fil-A, Dunkin Donuts, and McDonalds were the main hotspots, so you could say our America diet was off to a good start.

IMG_2078.JPG

How we Saved Money

If you’re anything like me, you are one budget-savvy, penny-pinching gal. If you’re anything like Dom, you think your bank account is unlimited and should be spent on pizza, always. For the sake of this section, let’s pretend you’re more like me LOL. New York City prices were a huge shock after being in SE Asia for so long, so to make our budget go further, I became an expert at seeking out cheap eats, free things to do, and getting around without breaking the bank.

IMG_2011.JPG

It may be a daily thing for city-goers, but for some of us, we’re not so experienced at subway travel. In the Philippines, Thailand, and Bali, my main form of transportation was either a motorbike, Uber, or Grab, so when it came to reading a subway map, it felt more like looking at a game of snakes and ladders. Luckily, Google Maps had my back, and was able to get us from point A to B every time. Each subway ride costs $2.75, so it’s super cheap compared to getting a taxi or Uber, and you can get across town within minutes even during rush hour. If you want to get the most bang for your buck and have a few days to see the sights, i’d recommend getting a tourist pass for the subway, which is well worth the $32 for unlimited rides.

Other than staying in hostels, eating cheap food, and taking public transport, my best money-saving tip is to take full advantage of any free activities. HI New York offers free activities and events (see above section), but if you’re looking for additional budget-friendly options, Travel and Leisure has an awesome list of 21 Totally Free Things to Do in NYC, so I’d recommend giving it a look!

Aaaaand that’s a wrap folks! Short, sweet, and magical. Our December trip to New York was able to restore our faith in big cities and was the most memorable way to end a wild year of travels. Big thanks to HI New York, HI USA, and all the amazing people we met there for making our trip extra special! Xoxo, Jess

Ultimate Guide to Coron

How to get there

Montenegro Shipping Lines

On our way to Coron, we had to go with the Phimal Ferry since Montenegro was all booked up due to the typhoon, and it was honestly a pretty rough journey. On the way out of Coron, however, we were determined to go with a different boat this time around, so we chose to travel with Montenegro and couldn’t have been happier with that choice.

The whole check-in process was an ease, the extra leg room was amazing, and it felt 10x safer than any other ferry we took in the Philippines! I was seriously impressed with their standards, and will always choose them for my future Philippines trips. The trip between Coron and El Nido (and vice versa) takes approximately 4 hours, so my advice is to bring some snacks, water, and maybe a motion sickness pill if the seas are choppy that day.

We ended up booking our ferry through a website called Biyaheroes, and I highly recommend using them for all your Philippines planning - There are over 7,000 islands in the Philippines, and trying to figure out how to get from point A to point B can be a serious challenge, so Biyaheroes can save you some serious stress!

I only discovered them during our last week in the Philippines, but it saved me so much research and planning time. All you do is type in your origin, destination, date you want to travel, and they do the rest for you! The website will show you how to get there (land, sea, or air), the cost of the trip, and how many seats are available. A true lifesaver when it comes to planning out your travels, and I only wish I found them sooner.

Where to Eat

FoodTrip

When we’re traveling, there are some things we splurge on and some things we try to do on a budget. Food is just one of those budget things for us, and we usually don’t have a problem finding a good cheap spot for food. Coron proved to be a bit more of a challenge though. It could be that we didn’t have a bike and couldn’t venture out of the main town, but we did find one place that we became absolutely obsessed with, and that’s FoodTrip.

IMG_0703.jpg
IMG_0706.jpg

Located just a few minutes from the boat tour pier, we discovered FoodTrip on day 3, and I kid you not, we ate lunch and dinner there for the next 5 days straight. They even knew our exact order by our third visit. I ate chicken fried rice for pretty much every meal (once I find a food I like I pretty much stick with it 😂), and for a giant plate it only cost 120 pesos, or roughly $2.20 usd). The local restaurants tend to have huge portions compared to the more popular western places, so you really get the most “bang for your buck”. And after a full day out on the water, there’s nothing you’ll want more than a big ol’ plate of food!

Where to Stay:

Casa Fidelis

For the ultimate relaxation experience in Coron, you NEED to stay with Casa Fidelis. Located about 20 minutes outside the main town, Casa Fidelis is a jungle oasis and one of the best accommodation experiences you’ll have while in the Philippines. The rural property is surrounded by lush jungles and home to the sweetest staff i’ve ever met, along with adorable cats, kittens, and dogs. Also a freaking amazing breakfast spread! For those of you who know me well, you’ll know that this is my idea of heaven. If you’re in the mood to get away from the crowds and re-connect with nature, this is an idyllic spot for you. Dom and I went out on one of their 3 Philippine-style boats on our last day in Coron, and I kid you not, it was our favorite day of our whole time in Palawan. Words can’t even do it justice, but i’ll give it my best shot below where I compare our private Coron tour with Casa Fidelis to our group tour with one of the tour companies.

Ina Homestay

If you’re in the mood to stay somewhere a little closer to town, we stayed at a little homestay found on Airbnb called Ina Homestay. We stayed there approximately a week, and had no complaints! It had everything we needed: good wifi (until more people checked in, to our dismay!), a super comfy bed, a spacious room, and even had a shared kitchen so we could make coffee and breakfast on the days we stayed there. Random tip: Blanca coffee is THE BEST coffee i’ve had in the Philippines, and it’s like 20 pesos per packet, so make sure to stock up on some for your travels. The only minor downfall of our stay at Ina’s was a shared bathroom, but in the grand scheme of things, that’s not so bad if everyone else is respectful of cleanliness. Ina Homestay is located just a quick walk from the main town, so it’s a great place to stay if you want something central and within walking distance from all the restaurants and shops.

Private vs Group Tour

We went on a couple different tours in Coron so we were able to compare the positives and negatives of each. Our first tour was a private tour with a local guy we met at the pier, our second tour was a group tour with a tour company, and our third tour (and by far the best), was our day on the water with Casa Fidelis.

6N9A9100.JPG

Private tour with casa fidelis

I will try to keep this short, sweet and to the point, but it’s going to be pretty hard considering I have a million great to say about our day with Casa Fidelis. We decided on a big snorkeling day, consisting of visits to WWII shipwrecks, lunch on a small yet unbelievably photogenic island, and a vibrant snorkeling sesh at Coral Garden. The verdict: AMAZING.

Our day started at 7am where we had the best breakfast spread we could've asked for - scrambled eggs, toast, fluffy American-style pancakes, a fruit platter, coffee, and loads of other delicious breakfast foods. If that wasn’t enough, we were also greeted by around 10 cats and kittens after our breakfast, and from that point on, I knew my day was going to be a great one.

After breakfast we headed down to the water where the Casa Fidelis boat was docked, and met our Captain for the day. Our first stop was a Japanese shipwreck where we snorkeled among the fish, splashed around the warm waters, and took GoPro shots of us diving down towards the boat. To top it all off, we were the ONLY boat at that wreck, so it felt eerie yet awesome to be the only ones snorkeling around something so impressive. Our second shipwreck was the more popular American shipwreck, and since we arrived around 10am, the water was crystal clear and you could see the whole ship. There were a few other boats there at that point, but we hardly noticed the other people while we were awestruck by the sight of the coral-covered wreck.

We then hopped back on the boat towards our lunch spot for the day, and boy were we in for a surprise. Lunch was served on Pass Island, and upon pulling up, I was speechless. The water was shockingly blue, the sand a blinding white, and the island was covered in tall palms full of coconuts. We were served fresh seafood, chicken and rice, veggies, a seaweed salad, fresh fruit, and water from a young coconut. The food combined with an absolutely epic view made it the most memorable lunch i’ve ever had. If you have the time, I HIGHLY recommend making a stopover at Pass Island to check it out. Our final stop of the day was a spot called Coral Garden, which once again, blew me away. We hopped off the boat into a deep drop-off, and swam our way over to the vibrant coral. We were yet again the only ones snorkeling, so we felt like royalty having such an impressive reef all to ourselves. It seemed as if the fish knew, because we spotted a turtle, a lion fish, and hundreds of brightly-colored fish who weren’t even afraid of us!

Ultimately, our day out on the water with Casa Fidelis was incredible. We had great - no, AMAZING food, breathtaking sights, the best guides, and a whole boat to ourselves for the entire day! I was so sad for the day to end, but it’s something i’ll remember forever. If you need more convincing, Dom put together a quick vlog of our day out on the water with Casa Fidelis which you can find on YouTube. We’re embarrassingly excited, so don’t judge us too harshly!

6N9A9157.JPG
6N9A9225.JPG

private tour with a local

For our very first trip, we were trying to get the most bang for our buck, so after reading a couple blogs and practicing my bargaining skills, Dom and I set off for the pier to go find ourselves a boat. We talked to a few guys offering tours, and each one seemed to have the same laminated price list for group tours vs. private tours. Since it was just the two of us and we had no friends in Coron (sad face), we bit the bullet and paid higher than what we had initially budgeted for, but ultimately still cheaper than any private boats in El Nido. A private boat for us to explore Coron Island was 2,500 pesos ($45 usd), and on top of that, we had to pay per destination visited. We opted to see 3 spots that day: Banul Beach, Twin Lagoon, and Kayangan Lake, so all in all, we paid around $30 each for a full day of island hopping. Not bad, not bad at all. The main reason we went with our local guy we met was because he promised we could leave before the other boats at 7am, but it seemed as if it was an empty promise. We arrived on time, and after being shuffled between 3 different boats, we sat for over an hour waiting for the tide to rise so we could leave. Not the morning we had planned, but also not the end of the world. I’m planning on writing another blog post about the specific destinations we visited, but let me just give you a tip: whichever spot you visit first will be amazing and quiet, and from there on out, you’ll be surrounded by orange life jackets filling the beautiful blue waters, so it’s a bit of an eyesore. Make the first stop count! Overall, the tour was good but not what I expected it to be. We got no food or water, received no information on the places we visited, and just overall felt a little underwhelming. It was nice having a boat to ourselves, but it didn’t even come close to comparing to our day out with Casa Fidelis.

group tour with a company

For our second tour, we wanted to go see the further islands of Malcapuya, Waling-Waling, and Coco Island, and since the boat prices were higher due to the farther distance, we decided to go with a group tour. We compared the prices of a few places in town, and settled on a tour with free pick-up leaving at 8am and costing 900 pesos each ($22 usd). I had the company name saved, but somehow deleted it so I don’t remember who we went with, but if you wander around the main town, you can find loads of tours offering this package. It was marketed as the “Ultimate Island Escape”, and pretty much lived up to its name. Our group consisted of 8 other people - mostly couples - and they were honestly all amazing. I was worried about a group tour since in El Nido they liked to cram 30 people onto a boat, and when you add life jackets into the mix, there’s not much room, but this tour was much, much better. The food was pretty good, the sights were great, the guides were informative, and it was ultimately a fun day out. If you’re on a strict budget, then I definitely recommend going on a group tour out to the farther islands. Since most tourists want to go to Coron Island, I think that’s a big reason why there were fewer people on our boat, which is a breath of fresh air compared to regular group tours.

IMG_0576.JPG
6N9A8458.JPG
6N9A8324.JPG

As for my ranking of tours, it goes like this:

  1. Private Tour with Casa Fidelis

  2. Group Tour to the outer islands

  3. Private Tour with a local

Beaches, islands, and lagoons, oh my! TruTravels 10 Day Philippines East Tour

I’ve been dreaming of visiting the Philippines for about two solid years now after seeing photo after photo of crystal clear waters, limestone mountains, and hidden lagoons. It’s always seemed like a far-off dream, destined to be at the top of my bucket list forever, but last month, this dream of mine was granted after Dom and I hopped on our very first group tour - the 10 Day Philippines East tour with TruTravels. So in October of this year, some legit life goals happened for me and i’m pretty sure i’ve reached the peak of my travel life!

A little bit of background: TruTravels is a company based in Southeast Asia with group tours to all the bucket list spots - Thailand, Vietnam, Sri Lanka, Bali, and more. When it was time for me and Dom to choose which tour to join, it was pretty much a no brainer upon reading through the itinerary for the Philippines East tour. Swimming the sardine run in Moalboal, visiting the mystical island of Siquijor, island hopping around paradise in Siargao… honestly, what more could we ask for?!

From then on, everything was a whirlwind of excitement. We eagerly booked our flights from Vietnam to Cebu for October 28, made sure our travel insurance was up to date, and started counting down the days to paradise!

Screen Shot 2018-11-28 at 5.44.38 AM.png
Photo 6-11-18, 5 08 07 pm.jpg

THE GROUP

I’m very rarely in group situations these days, so when Day 1 of the 10 Day Philippines East tour rolled around and it was time to meet everyone for the first time, I was actually NERVOUS! The group all trickled in from the airport throughout the day, so our first main activity was a group dinner at the House of Lechon.

Side note: *If you’re in Cebu and like meat, this place is freaking epic. I don’t eat pork yet I was still drooling over all of the add-ons (cheese-stuffed jalapeños FTW), so if you’re a meat eater, you’ll be in Lechon heaven.

While stuffing our faces and grabbing some happy hour drinks (for $1, I should add!!), we all bonded over embarrassing karaoke songs, super strong mojitos, and an excitement for the ten adventure-filled days to come.

I’ll try to keep this section short, though I could probably write a short novel about this wonderful group of people. Spending ten days with a group of 15 people, you kind of expect there to be some cliques that eventually form, right? WRONG! All 15 people were the most friendly, caring, and entertaining humans i’ve ever encountered, and I was honestly shocked how quickly we all became friends.

Photo 31-10-18, 4 20 59 pm.jpg


THE ACTIVITIES

Photo 31-10-18, 1 57 41 pm.jpg

Oh, the activities! I’m still in disbelief over some of the things we did and saw, but here’s a list of my favourite moments:

Photo 31-10-18, 8 05 34 am.jpg
  • Canyoneering to Kawasan Falls: Easily my favourite day of the tour… maybe of the whole year. If you’ve ever wondered what it would be like to jump off 40ft cliffs into the bluest waters you’ve ever seen, then you need to do some canyoneering with TruTravels.

    Not only was it the best bonding activity for the group (I never would have had the cohones to jump off those cliffs without everyone cheering me on), but it was also INSANELY fun. We ended our adventure day at the famous bright blue Kawasan Falls, and i’m pretty sure our whole group can agree it’s a day we’ll be telling stories about for life.

  • Swimming the Sardine Run: Snorkeling while being surrounded by millions of sardines = A-freakin-MAZING. The Moalboal sardine run was something I had never even heard of before joining the TruTravels trip, but on Day 3 of the tour, our group hopped on a boat and ventured around the islands of Cebu.

    The day started with snorkeling at a remote island, and I remember looking down at the vibrant coral, starfish, and fish below and thinking how the day couldn’t possibly get any better than that. Well boys and girls… it did. Our second stop was the sardine run, and upon diving into the water, we were immediately surrounded by MILLIONS of sardines. Not hundreds, not thousands, but I swear there were millions of them, all moving in sync with one another while us snorkelers paddled around them. It was like watching a performance, and left me seriously lost for words.

  • Experiencing the magic of Siquijor: Our third destination on the TruTravels Philippines tour was the most unique, as we headed to Siquijor, an island known for its voodoo, witchcraft, healers, and black magic. I soon learned that Filipinos actually fear this island, which made it all the more exciting to experience (in my opinion!). While everything in Siquijor seemed to be magical (the cascading tiered waterfalls, the shockingly blue waters, and the palm-lined roads), it was our visit to the faith healer that sold it to me.

    On Day 6, our group headed to the home of a woman to have our bodies healed and our palms read, and it was the most unique thing i’ve ever experienced. My only regret of the day was admitting that I had a cold, and the faith healer squeezed some not-so-nice-smelling leaves over my freshly-washed hair to help my health improve… big mistake on my end, but a hilarious memory to look back on!

  • Everything about the island of Siargao. If I had to choose my one all-time favorite memory from the TruTravels trip, it would undoubtedly be Siargao. Upon arriving, we were met with a van ride through the palm-covered mountains, and even on a rainy day I was blown away by its beauty. Siargao has the charm of a local island along with having some of the most beautiful spots I have ever seen, and I am 100% certain it’s going to be a serious tourist hotspot someday.

    This island was our final stop on the 10 Day Philippines East tour, and I couldn’t have imagined a better place to end the trip. We spent the days learning to surf (and fall gracefully), island hopping to some of the most pristine beaches i’ve ever been to, eating like royalty, enjoying super cheap drinks every night, and wishing the tour didn’t have to come to an end. It’s hard to put Siargao into words, and I don’t think photos can even do it justice, but take a look at the photos below and see why I fell in love.

    Also, a little pro tip I learned about Siargao - if you’re going island hopping, put in a request to do the tour backwards, starting at Guyam Island, visiting Daku Island for lunch, and ending the day on Naked Island for sunset. You’ll miss a lot of the tourists and end up having Naked Island completely to yourself to watch the skies turn pink! I can’t recommend that more highly.

THE ACCOMMODATION

To be honest, I was expecting to stay in hostel dorm rooms every night of the tour, but boy was I way off. Way, WAY off. We each shared a private room with one other group member, so I was lucky enough to be put with Dom LOL. We stayed in 4 different hotels/resorts during our 10 Day Philippines East tour, each seeming to be more beautiful than the last. Starting off the tour with a bang, we had 1 night in Cebu where we stayed at Red Planet, a comfy hotel directly across from my favorite Cebu hotspot: the mall! I was going through a serious fast food withdrawal after 6 months in SE Asia, so access to McDonalds was like a gift from God.

Our second destination was Moalboal, Cebu, where we stayed at a beachside resort featuring a swimming pool and one of the nicest owners ever, Angel - she literally handed me and Dom sandwiches at 6am when we were heading out for an early morning of exploring - she lives up to her name for sure.

On the island of Siquijor, our resort was a similar beachside resort featuring tons of towering palm trees, flowers, and AN EPIC POOL! Within 10 minutes our group had taken over the giant pool and were playing our own version of NFL football using a tiny pink ball. We came up with secret plays and everything. It was legit.

Our final hotel in Siargao exceeded all of our expectations though, because we were greeted by a huge resort by the beach, an amazing restaurant, and the biggest rooms of the whole trip. There were also dogs, so you know I was loving life especially hard.

Photo 6-11-18, 1 53 00 pm.jpg

Word to the wise: wifi is pretty hit or miss in the Philippines, so luckily TruTravels had warned us of this prior to arriving, and we came prepared with a SMART sim card to get us through the slow stages. Definitely a lifesaver! My recommendation: a 30 day SMART Sim Card gets you 16 gb of data and costs 1,000 php, or $18 usd. You can get them from the Cebu airport in the arrivals area, so definitely check out the options before leaving the airport!

THE FOOD

I’m drooling just thinking about it.

We ate like Kings and Queens during our 10 days with TruTravels, and now that the tour is over and i’m back on that budget noodle grind, i’m missing the tour food extra hard. It was honestly the perfect mixture of Filipino food and Western food throughout the trip, and every night was seemingly better than the last.

My favorite meal of the trip definitely had to be our seafood lunch on Daku Island, and we ate our way into food comas with platters of fresh fish, chicken, veggie dishes, and tropical fruit.

BRB, i’m going to go cry into my bowl of instant noodles now.

OUR TOUR LEADER

6N9A4463.jpg

I may be biased, but our tour leader Jason “Jase” is BY FAR the greatest tour leader to ever exist.

He somehow got all fifteen of us from point A to point B every single time without any problems, he took care of us when we weren’t feeling our best *cough* hungover *cough*, he got us super excited for every single activity. And best of all? He got us McDonald’s when we were all being babies about waking up early for our big travel day. That won him MAJOR points in the tour leader department. Except when it caused the big hash brown dilemma of 2018, when one of our group vans “accidentally” ate the other’s hash browns… #neverforget!!! Haha.

But back to Jase, his infectious energy is the thing that turned the tour from being great, to exceptional, and I know we’ll all be friends for life because of him.

Also, for those of you who managed to catch my Instagram LIVE from Naked Island on Siargao, you will recognize Jase as my special guest. Any questions about the tour, I highly recommend you shoot him a message because he will set your mind at ease and get you super duper excited to see the Philippines!

Thanks for being the best tour guide, Jase!

THE TRANSPORTATION

We rode in style on the TruTravels trip. Vans, ferries, planes, boats, trikes.. we did it all! The Philippines is massive, and if you’ve never been here before, it’s pretty hard to navigate your way without getting lost, which is why I was SO grateful to have our trip all planned out for us. It made it so easy to have Jase telling us exactly what we were doing for the day and organizing the transportation for us.

final thoughts

I couldn’t have planned a better trip if I tried, and every single moment of the tour was easy, carefree, thrilling, and memorable. The Philippines East trip started off my time in the Philippines in the absolute best way possible, and I now have a new favorite country thanks to TruTravels. I got to do things I had only dreamed of, faced and conquered some of my biggest fears, and did it all alongside some truly incredible people,

As a couple, me and Dom weren’t sure what to expect when meeting and traveling with a group of 15 (after all, we’ve been traveling with nobody but each other for the past year!), but those fifteen people quickly grew to be our own little travel family, and I am so thankful for the opportunity to meet them all. Nando’s reunion 2019, anyone? If you’re traveling as a couple, solo, with friends, or even with family, a TruTravels tour is perfect for you. It’s the ideal mix of adventure, culture, and fun, and perfect for anyone who wants to let someone else take care of all the travel planning details for once and just go with the flow.

Our tour was 10 seriously awesome days of exploring Philippines East, but if you want to see even more of the islands, TruTravels also has a 19 day Philippines Island Hopping Experience that hits all the bucket list spots like Moalboal, Siquijor, Siargao, El Nido, Coron, and way WAY more!

So if you’re thinking of doing a group trip and have any questions at all, shoot me a message and ask me anything! x

Photo 4-11-18, 2 54 38 pm.jpg
Photo 3-11-18, 1 06 14 pm.jpg
Photo 1-11-18, 5 47 45 pm.jpg
Photo 31-10-18, 8 44 09 am.jpg

How to download + install Paradise Mobile Presets

This guide will help you install your new preset collection into the FREE Adobe Lightroom Mobile app, without needing a subscription for the Desktop version.

Step 1: Download the free Adobe Lightroom Mobile app from the app store, if you don’t already have it.

Step 2: Download DNG files to your computer.

After purchasing the Paradise Mobile Collection, you will have received an email containing a zipped file with your new Paradise Collection presets.

- Download the file to your computer (as phones are unable to open ZIP files)

- This folder contains 11 DNG format files (each of which contains a unique preset), which can then be downloaded to your phone in Step 3.


Step 3: Transfer the files to your phone

These are fairly large files, so if you cannot Airdrop or email them to your phone, my personal favourite method is to use Dropbox.

  • To use Dropbox, simply import (or drag & drop) your DNG files into your Dropbox folder.

  • Once all your files are synced and ready, go into your Dropbox folder on your phone and export each DNG file into your phone (Tap 3 dots next to DNG image - Export - Copy to Lightroom) *Repeat step for each photo

Photo 26-11-18, 11 10 59 pm.png
Photo 26-11-18, 11 12 36 pm.jpg
Photo 26-11-18, 11 13 00 pm.jpg


Step 4: Import the files into your Lightroom app

If you’ve made it this far, all of of your DNG files should be saved in your phone’s camera roll, and you’ll also see them in your Lightroom Folder, All Photos

  • Open the Lightroom app and create a new album.

  • Name the album “Paradise Presets” (or anything you’ll remember)

  • After you’ve created your new album, open it up and then click on Add Photos.

  • Select all the blank DNG files from your camera roll, and click Add.

Photo 27-11-18, 8 30 39 pm.png


Step 5: Create & Save your new Presets

This step should save you a whole lot of copy and pasting time! It seems daunting, but it’s not as confusing as it seems and you only have to do this process once per preset.

  • Go into your new “Paradise Presets” album.

  • Open the first photo file, click on the 3 dots in the upper right of the screen, and then click on the option Create Preset. This takes you to the New Preset box (shown below right) with customizable options.

  • Give your preset a new name (if you want to keep my own preset names, just take a look at the original Dropbox files to find each preset’s name!). Under Preset Group, you can either select User Presets, OR create a new Preset Group if you want to keep it organized. Then, you can customize the preset’s options - You should have all boxes checked, but I personally never select Tools.

  • When this is done, click on the checkmark in the upper right corner to save your preset. You’ll need to repeat this step for each DNG file, since each preset has to be saved separately.

Photo 27-11-18, 8 29 01 pm.png
Photo 27-11-18, 8 29 08 pm.png
Photo 27-11-18, 8 29 12 pm.png


Step 6: Applying the presets to your own photos

To use your new presets, go back into your Lightroom app’s photo library, and open any photo from your camera roll you’d like to edit.

  • Once the photo has opened, scroll all the way to the right to find the option Presets. When you click that, it opens up a box with all your saved presets.

  • If you’ve saved them into their own separate folder (not in User Presets), simply navigate to the correct folder.

  • Now you can click on each preset to see what it looks like applied to your photo.

  • Once you’ve found a style you like best, simply tap on the check mark, make any other tweaks to the colors or lighting, and save the photo to your camera roll. Voila! Your edited photo is now in your camera roll and ready to post.

Photo 27-11-18, 10 02 21 pm.png

Getting cash in the Philippines when the ATM's don't work

I’ve had my fair share of struggles while traveling, but most of the time they can be resolved easily with a little bit of flexibility and a coffee to calm myself down.

Between flight cancellations, typhoons, finding sick puppies, emergency doctor visits, death-defying van trips, and way more, the one thing that still stresses me TF out more than anything else is when I can’t get cash out of an ATM when I’m pretty desperate for it.

Photo 23-11-18, 10 04 20 pm.jpg

What makes things significantly more challenging here in the Philippines is when you’re in a location with only 1-2 ATM’s in the region (which tbh is pretty common), and you are down to your last few pesos. Even the more popular tourist hotspots like El Nido and Coron can be a struggle, where the ATM’s run out of cash on a daily basis and you could be left cashless quite often.

Thankfully, before you start pulling your hair out, there’s a way around this challenge which I had to learn the hard way on the island of Siargao. I was desperately in need of cash to pay our accommodation before heading to the airport, and the one ATM in our area decided it didn’t like my credit card, debit card, AND even Dom’s card. After having a mild freak out and asking some of the passerby’s about it, I found an easy solution to my problem: World Remit.

World Remit is an app that you can download and send money pretty instantaneously to a friend, family member, or in my case, MYSELF. After the ATM debacle, I had created an account within minutes and was ready to send myself some much-needed cash.

Use code JESSICAJ137 to get $35 back when you make a transfer over $100


Through the app, I chose to pick up my money from M Lhuillier because that was the closest store to my accommodation in Siargao, but there are a few other options you can choose from when sending money through World Remit if you’d prefer to pick up your money from another shop. M Lhuillier looks like a bank when you walk in which I prefer since it just feels more legit!

*Note, you may have to submit a photo of your passport to World Remit via email in order for the money transfer to be processed, so if that’s the case, expect to wait a few hours or so for the transfer to work.

PHOTO

The next morning, I headed down to road to M Lhuillier with my passport and World Remit app handy, showed them my receipt number, signed a form, and voila, I was handed the 9,000 php I sent myself! The money transfer fee actually costs LESS than the ATM fee would have charged me, so it’s an amazing option to keep in mind when traveling.

So if you get stuck for cash at an ATM while traveling in the Philippines, World Remit can save you from some serious stress!

Booking a private tour in El Nido

palmtree.jpg

If you were to ask me the one thing that gets on my nerves most while traveling, it’s public tours. While not *all* tours are always over-capacity, the majority in SE Asia will try to maximise their profits by allowing waaaay too many people on the boat, shoving way too many people in the van, or allowing an insane # of people on the bus.

A prime example is our bus ride from Puerto Princesa to El Nido, where we caught the early van and had the pleasure of sharing 3 seats between 4 of us. A rough four hours, but our neighbors definitely enjoyed the sleeping pills I gave them 😂

But when it came to island hopping in El Nido, I was NOT about to get on an overloaded boat for my few days in paradise. Luckily, there are options other than the public group tours, so I’m going to share exactly how it went down!

PUBLIC BOAT TOURS

Public tours are sold by just about every tour agency here. There is no shortage of tours, and just a simple walk down the main road will get you offers for tour A, B, C, D, or even the mysterious L tour.

The public tours range between 1200 php ($24 usd) and 1500 php ($30), which include lunch and entrance fee to the islands. However, these boats all leave roughly around 10am, so by the time you get to your first destination, there are another 10 boats alongside you.

6N9A6729.jpg

PRIVATE BOAT TOURS

We opted for a private tour, meaning we got a whole boat to ourselves, and the benefits are pretty self-explanatory:

  • 7,000 php for an entire boat ($130)

  • Includes a freaking amazing lunch

  • You can get permission from the coast guard to leave earlier to beat the other boats

  • You can choose your own schedule and decide which order to visit each island

  • You can mix and match the islands rather than choosing Tour A, B, C or D

  • Spacious AF! We had 7 on our first trip (1000 php each), and 4 of us on our second day trip, while some other boats I counted 27 people! That means nobody had to fight to get those perfect front-of-the-boat shots

IMG_0014.JPG
IMG_0012.JPG

HOW TO BOOK

As for the private tours, you can go to pretty much any tour agency and ask the cost of a private boat. They will start at 8,000 php most likely, but if you hesitate and chat amongst yourselves about the “other tour down the road who offered 7,000”, you’ll definitely get a deal. We went with a company called Carao-Cao Travel & Tours on the main road located next to Squidos restaurant - and they were great although we were supposed to leave at 8:30 which turned into 9:30 on our second trip. Not a big deal though!

AN EVEN CHEAPER OPTION

If you’re even more stingy than me (if that’s possible), you can try to arrange a local boat from the guys hanging around the pier. Without food included, you may be able to whack off another 1,000 pesos and get a boat for 6,000, so it doesn’t hurt to ask around!

But all in all, if you have a few friends who don’t mind spending a few extra dollars, you’ll get a MUCH better experience and feel like rockstars on your own personal boat.

DJI_0106 copy.jpg

10 Photos to Convince You To Visit the Island of Siargao

Hidden lagoons, baby blue waters, and palm-covered landscapes - what more do you need?! Photos don’t do it justice, but these 10 images of Siargao should help convince you that you need to drop what you’re doing and book a flight to this wild little island paradise ASAP.

*All photos taken on iPhone 8 Plus, DJI Mavic Pro Drone, & Canon 5D Mark IV

Sugba Lagoon, Siargao

Sugba Lagoon, Siargao

Daku Island, Siargao

Daku Island, Siargao

Hidden Palm, Siargao

Hidden Palm, Siargao

6N9A6204.jpg
Daku Island, Siargao

Daku Island, Siargao

6N9A6135-2.JPG
Sugba Lagoon, Siargao

Sugba Lagoon, Siargao

Guyam Island, Siargao

Guyam Island, Siargao

En Route to Sugba Lagoon, Siargao

En Route to Sugba Lagoon, Siargao

Island Hopping - Naked Island, Siargao

Island Hopping - Naked Island, Siargao

southeast asia

Untitled-2.png

A ​Backpacker’s ​Cheap Travel Guide ​to Bali

A ​Backpacker’s ​Cheap Travel Guide ​to Bali

Bali is the closest thing to paradise i have ever experienced.

You see it blasted all over Instagram and probably have rolled your eyes once or twice when you scroll past yet another photo of the Gili Island beach swings for the millionth time, but it has a certain draw to it.

Personally, I was drawn in by the colors. Every single photo I saw, Bali looked like the greenest, bluest, and most tropical place i have ever seen, and of course I was hooked.

In August, I decided to book a 10-day solo backpacking trip to the tropical region of Bali, Indonesia. 

Read More

THAILAND: EXPLORING KOH NANG YUAN

I didn’t think I could love any island more than Koh Phangan, but the neighboring island of Koh Tao has done it. Even during monsoon season, with grey skies, muddy roads, and rain-soaked tourists, this island is breathtaking.

I got the opportunity to dog and house-sit for the week, so I jumped on a ferry and traveled the 45 kilometers over to Koh Tao. I fully expected to be trapped inside the house for the next week, as rainy season means torrential downpours and it isn’t exactly beach weather.

When I woke up yesterday, however, I could see blue skies and sun, so I hopped on my bike and made my way to the beach. I booked a roundtrip longtail boat ticket from Lotus Bar for 250 Baht, then headed over to the popular tourist destination, Koh Nang Yuan.

Read More

SINGAPORE: WHAT TO DO IN 1 DAY

SINGAPORE: WHAT TO DO IN 1 DAY

1. UNWIND AT THE MARINA BAY SANDS
The Marina Bay Sands is one of the most unique landmark hotels in Southeast Asia. It's made up of three towers of luxury hotel rooms joined together by a large rooftop infinity pool on level 57. The rooftop terrace offers panoramic views of the city and is the perfect place to catch the sunset after your day of exploring the city. Unfortunately, the hotel does not allow guests to use the infinity pool, but you can still get a glimpse of the innovative pool at one of the several restaurants and bars on level 57.
 
Fun Fact: The two, very exclusive Chairman Suites at the Marina Bay Sands are 629 square meters each. That's bigger than the size of 2 tennis courts!

Read More

BALI: 10 DAYS FOR $180

Everyone has seen photos of Bali. Whether intentional or not, we’ve all been there: Scrolling endlessly through Instagram and then BAM, there it is. The 20-something-year-old model posing on an inflatable unicorn in a jungle infinity pool. I was the type to torture myself by following these girls, thinking “why can’t that be me?” Well first and foremost, i’m not a model, but I also thought there was no way I could afford a place like Bali.

Bali is the type of destination people go to honeymoon and have photoshoots in villas. But as it turns out, Bali isn’t as expensive as it appears, and I spent 10 days in 4 different locations for under $180. That included transportation within Bali, accommodation (including a luxurious Airbnb), food, and all activities.

Read More